The 60-second tour
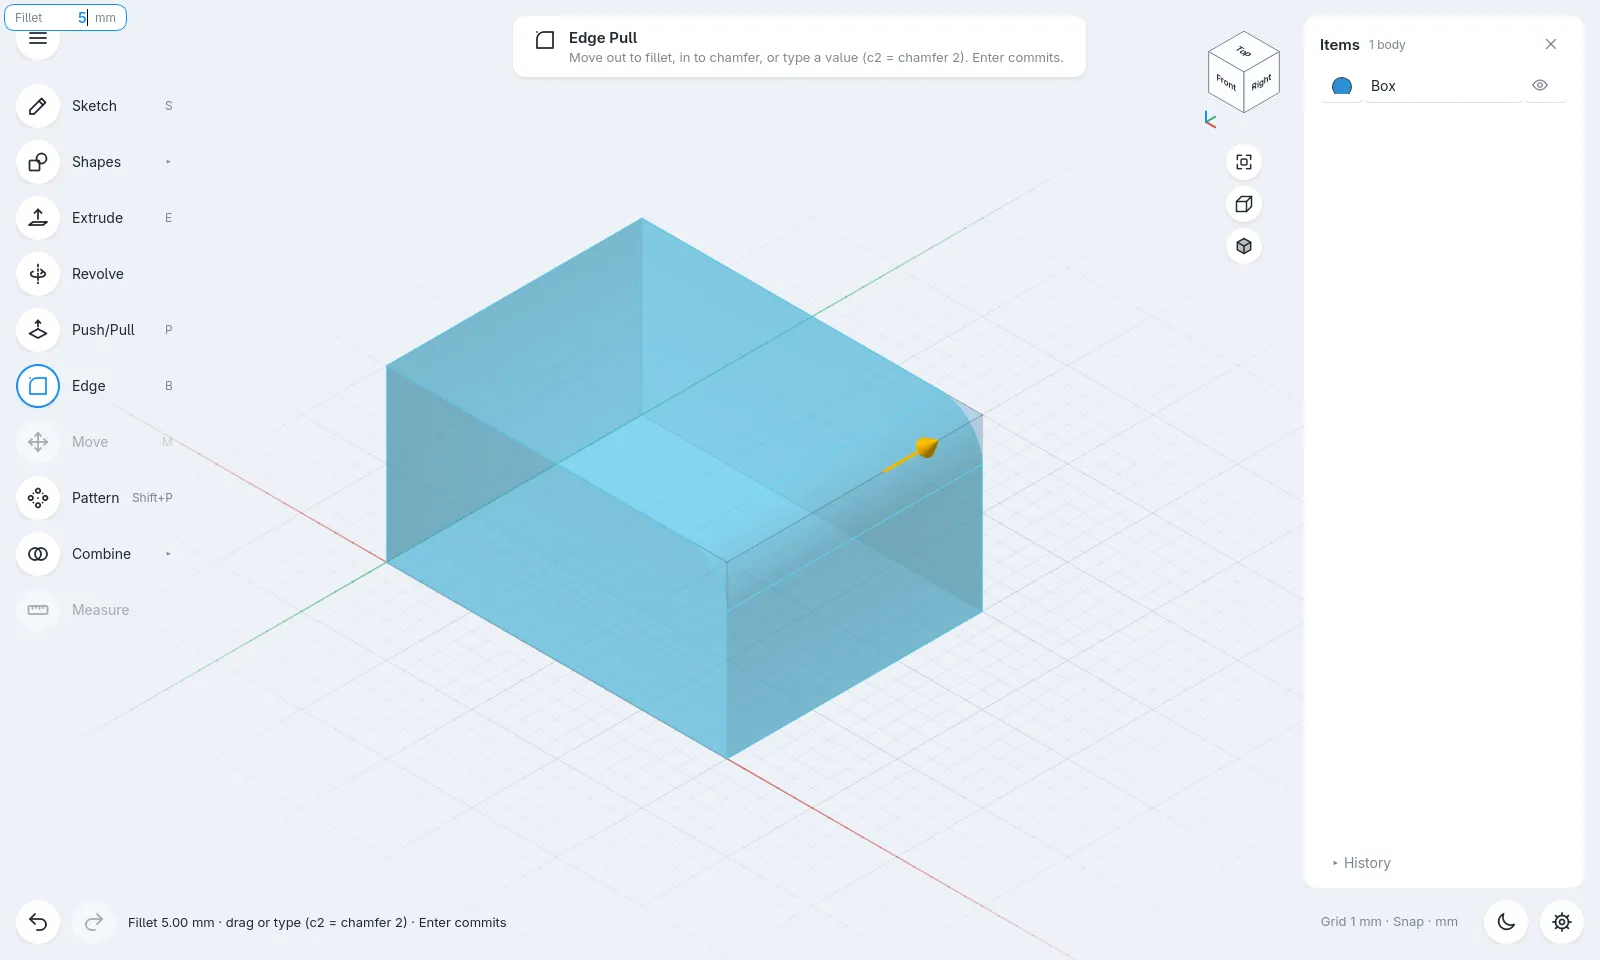
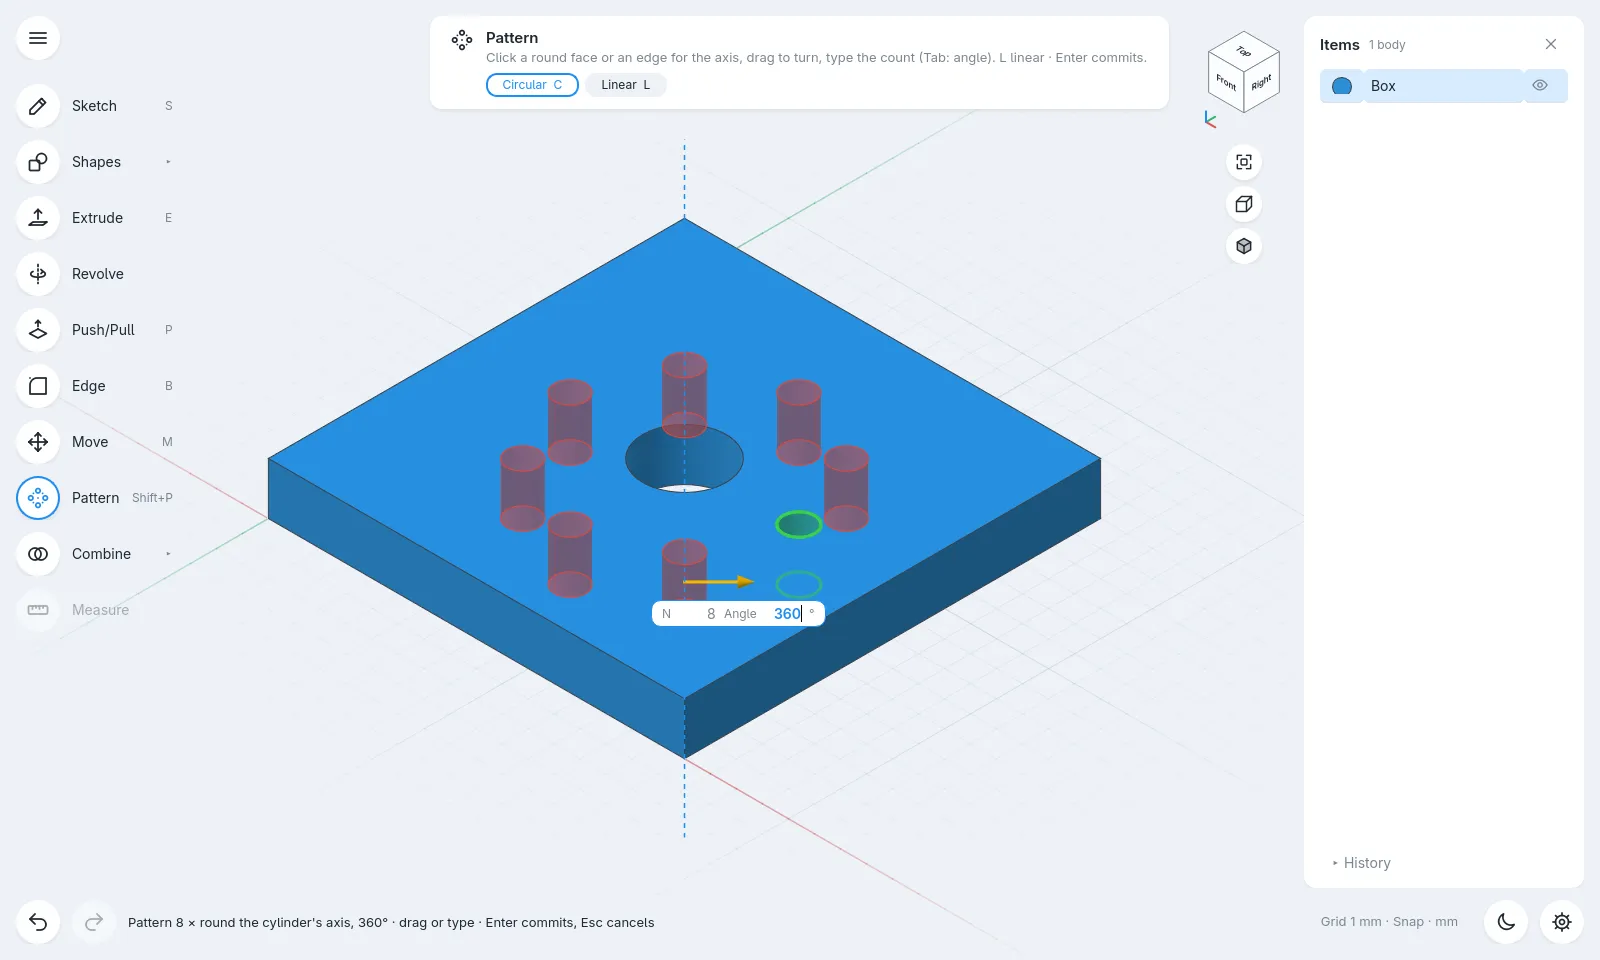
One window, one mode. Sketching and modelling happen in the same view. Hover or tap the numbers.
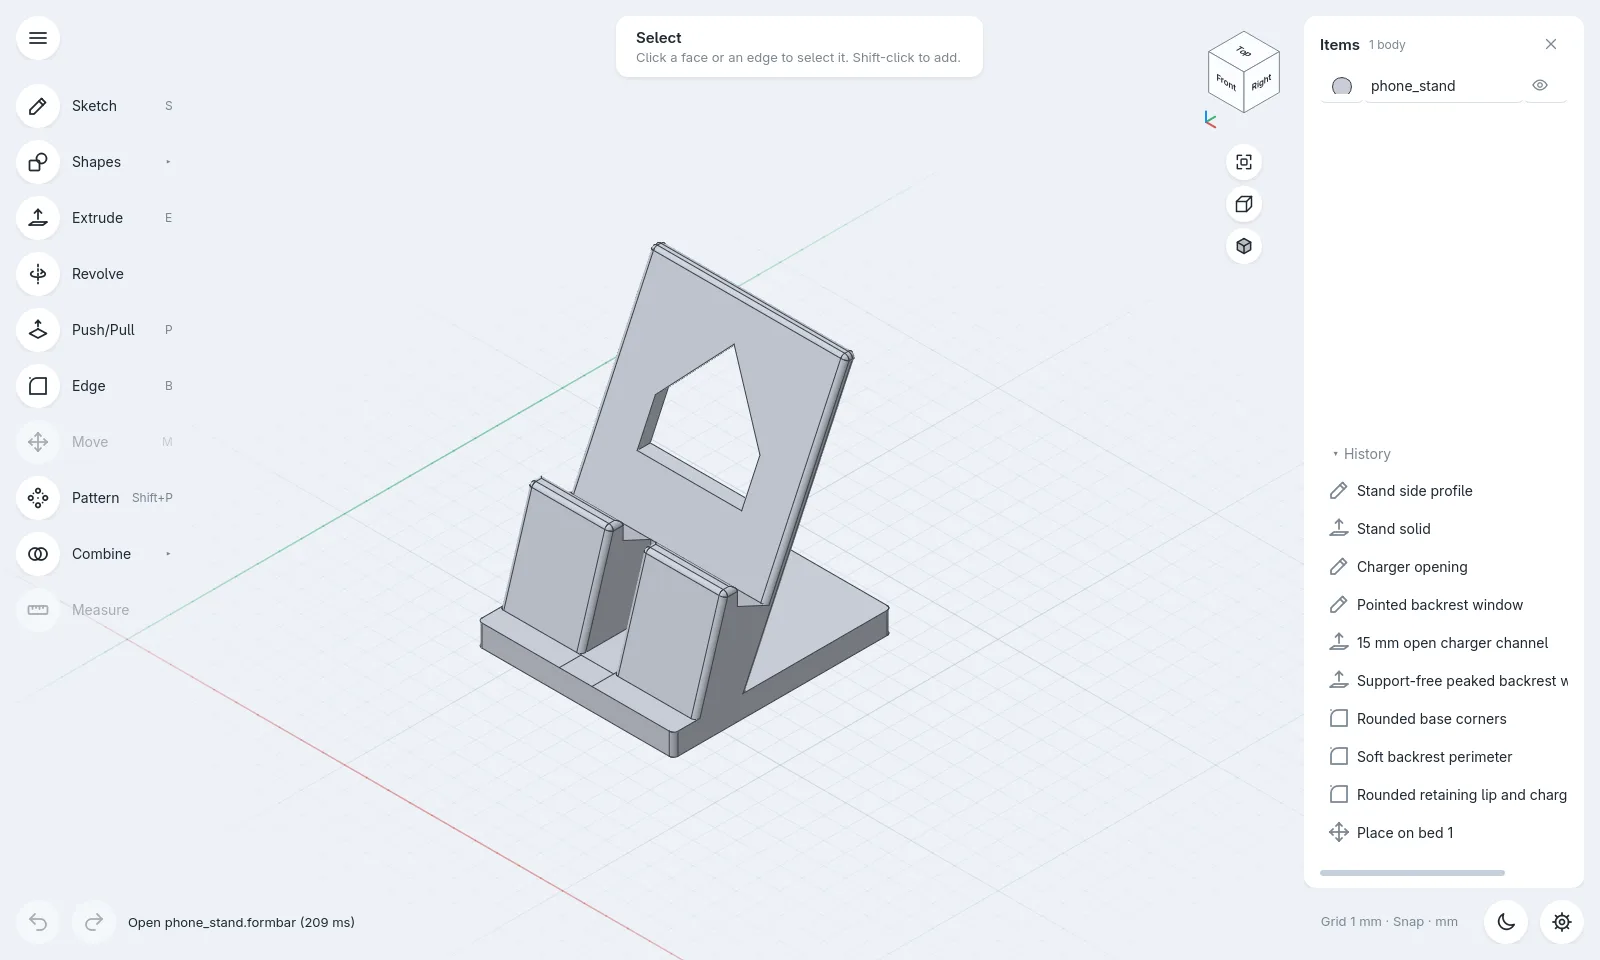
- 1Menu
New, open, save, export, settings.
- 2Tool rail
Sketch, Shapes, Extrude, Revolve, Push/Pull, Edge, Move, Pattern, Combine. Shortcut letters on the right.
- 3Hint card
Always tells you what the current tool wants next.
- 4View cube
Click a face or corner to look from there.
- 5View rail
Fit, switch projection, change render style.
- 6Items & History
Your bodies on top, every step you took below.
- 7Undo, redo, status
Undo always works. The status line says what just happened.
- 8Theme & settings
Light, dark, grid and snapping.
Your first part: an L-bracket
A 60 × 40 mm L-bracket with two holes, a rounded bend and bevelled outer edges. Seven steps, and you will have used most of formbar.
- 1
Draw the L
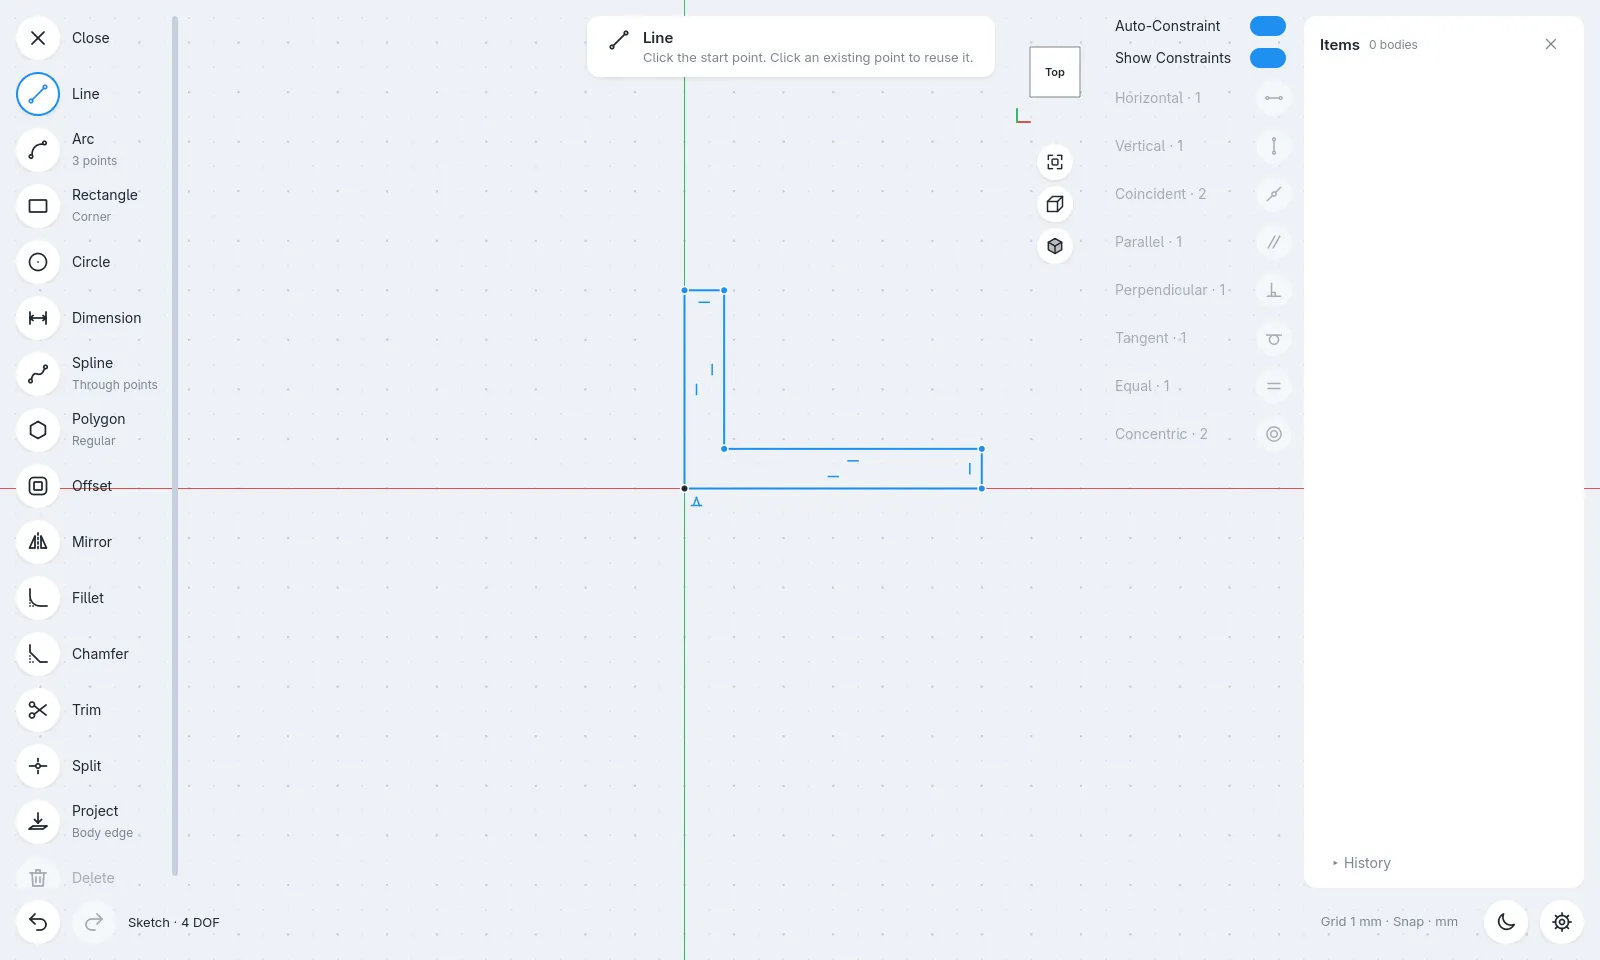
Press S to sketch on the ground plane, then L for lines. Click the corners: 0,0 → 60,0 → 60,8 → 8,8 → 8,40 → 0,40, and back to the start. The shape closes itself.
SL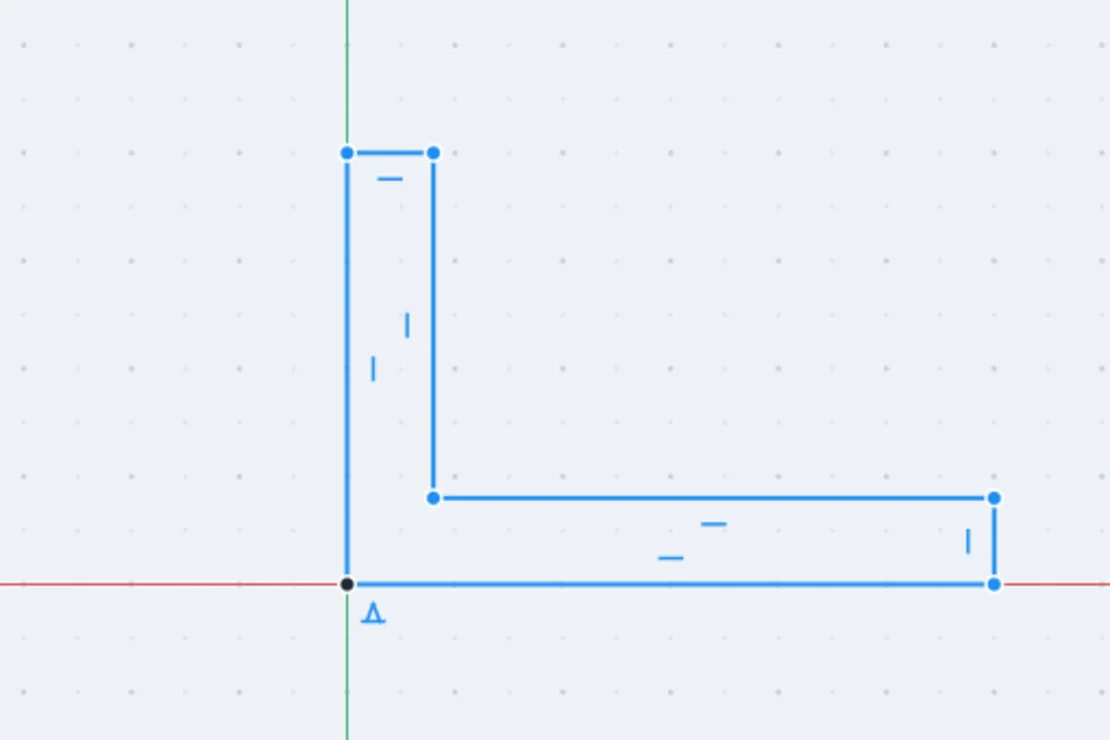
- 2
Pull it up 40 mm
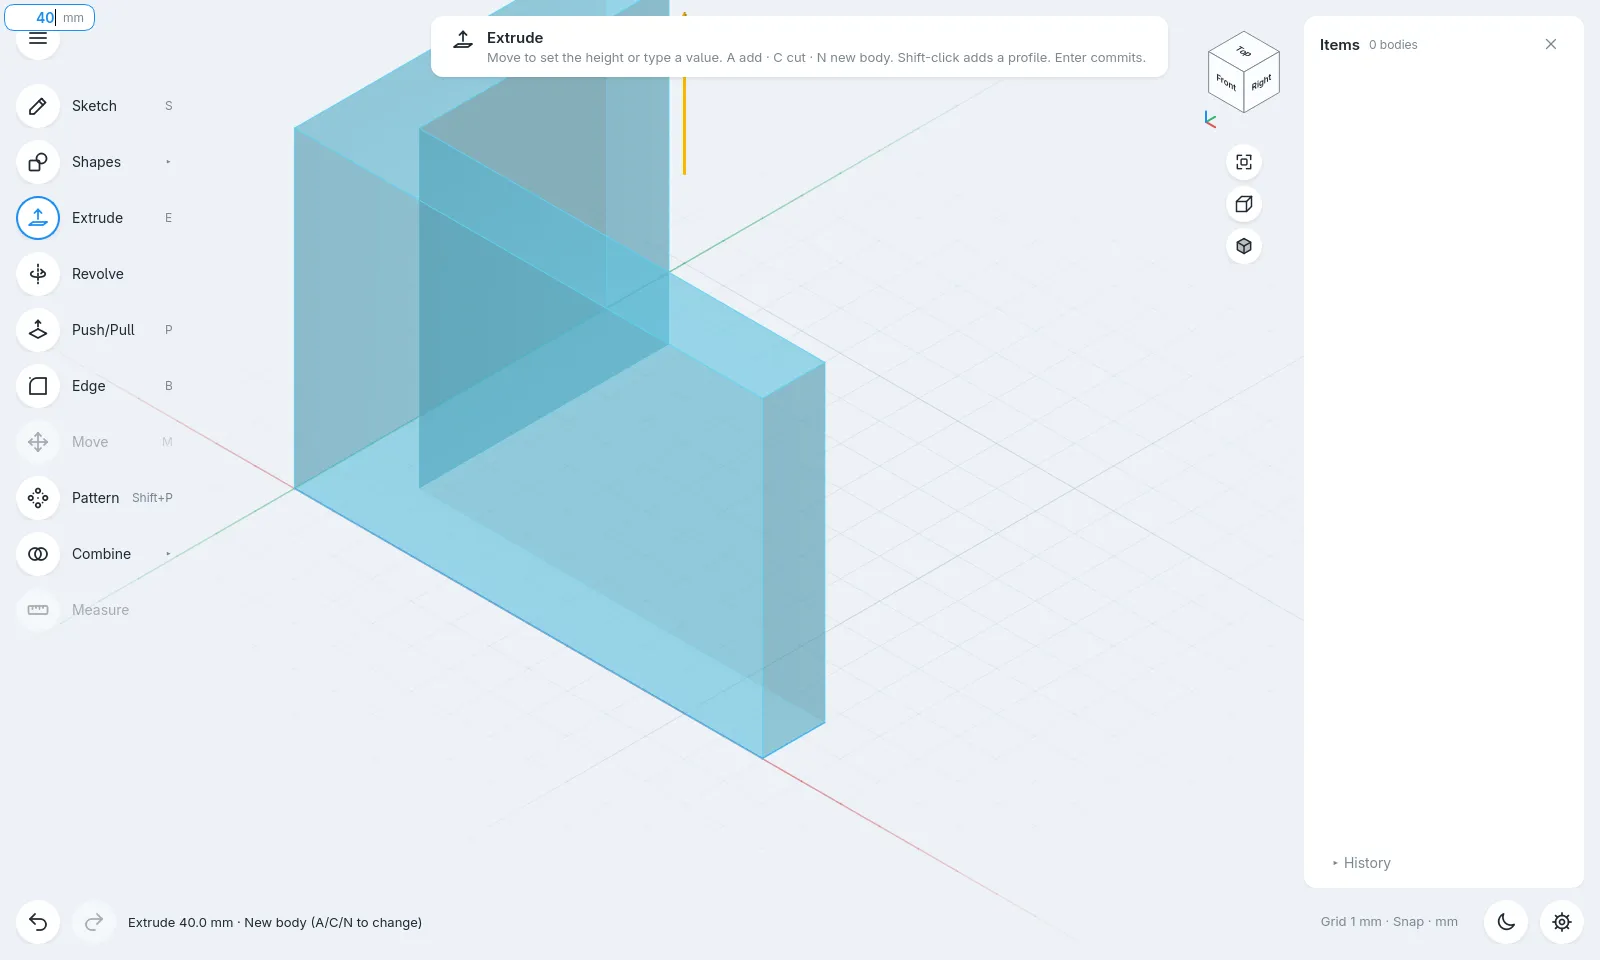
Press E. formbar leaves the sketch and grabs the profile. Move the mouse up to preview, type 40, press Enter.
E40Enter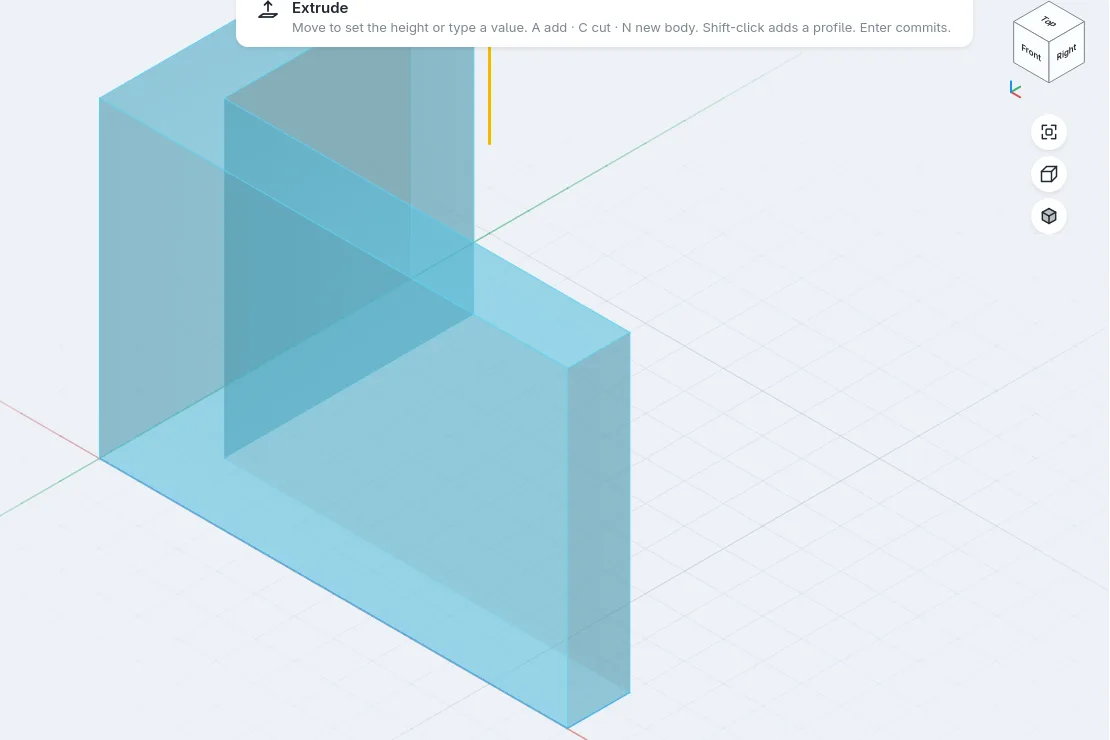
- 3
Sketch on the upright
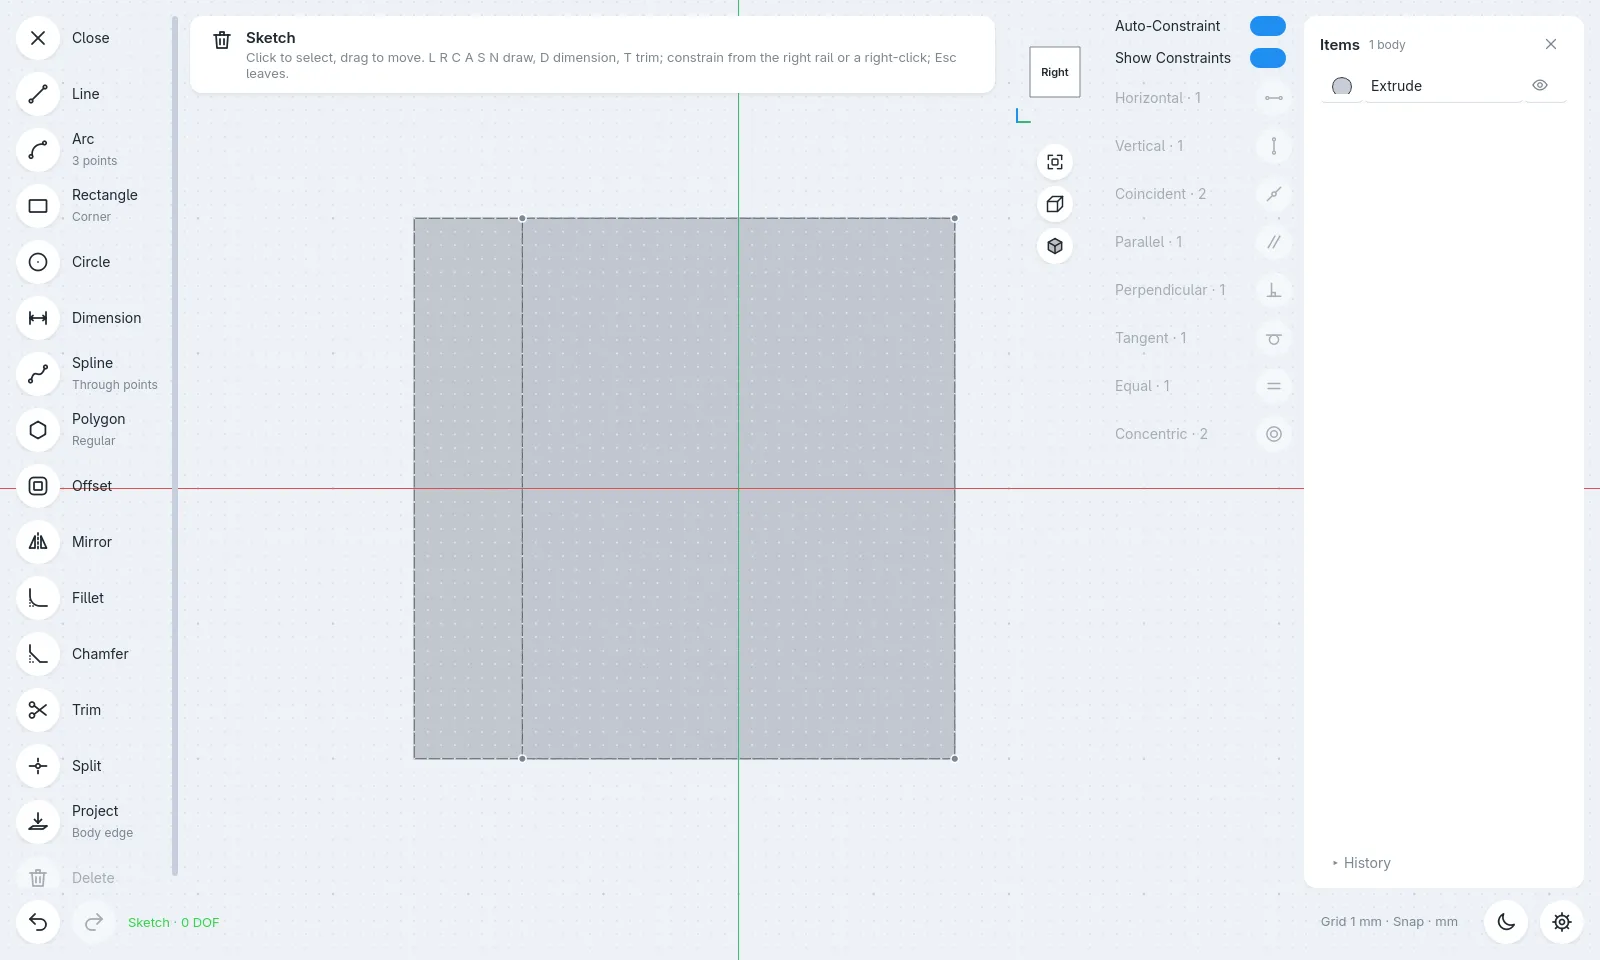
Click the inside face of the upright to select it, then press S. The view turns to face it squarely.
S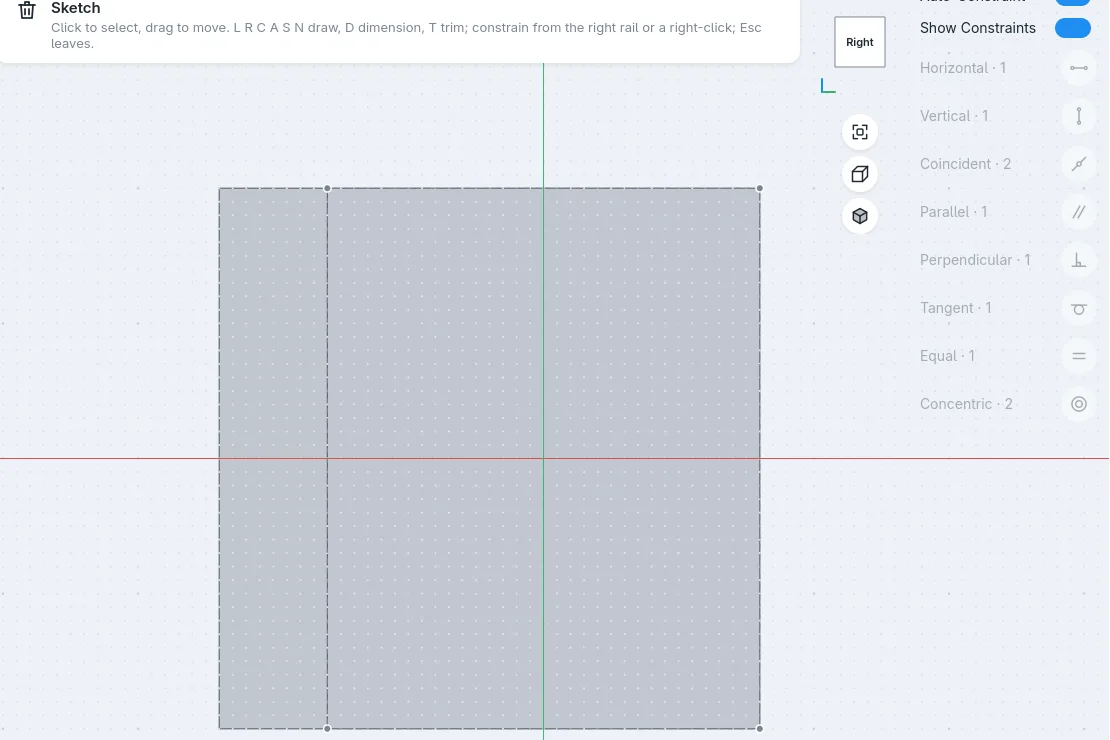
- 4
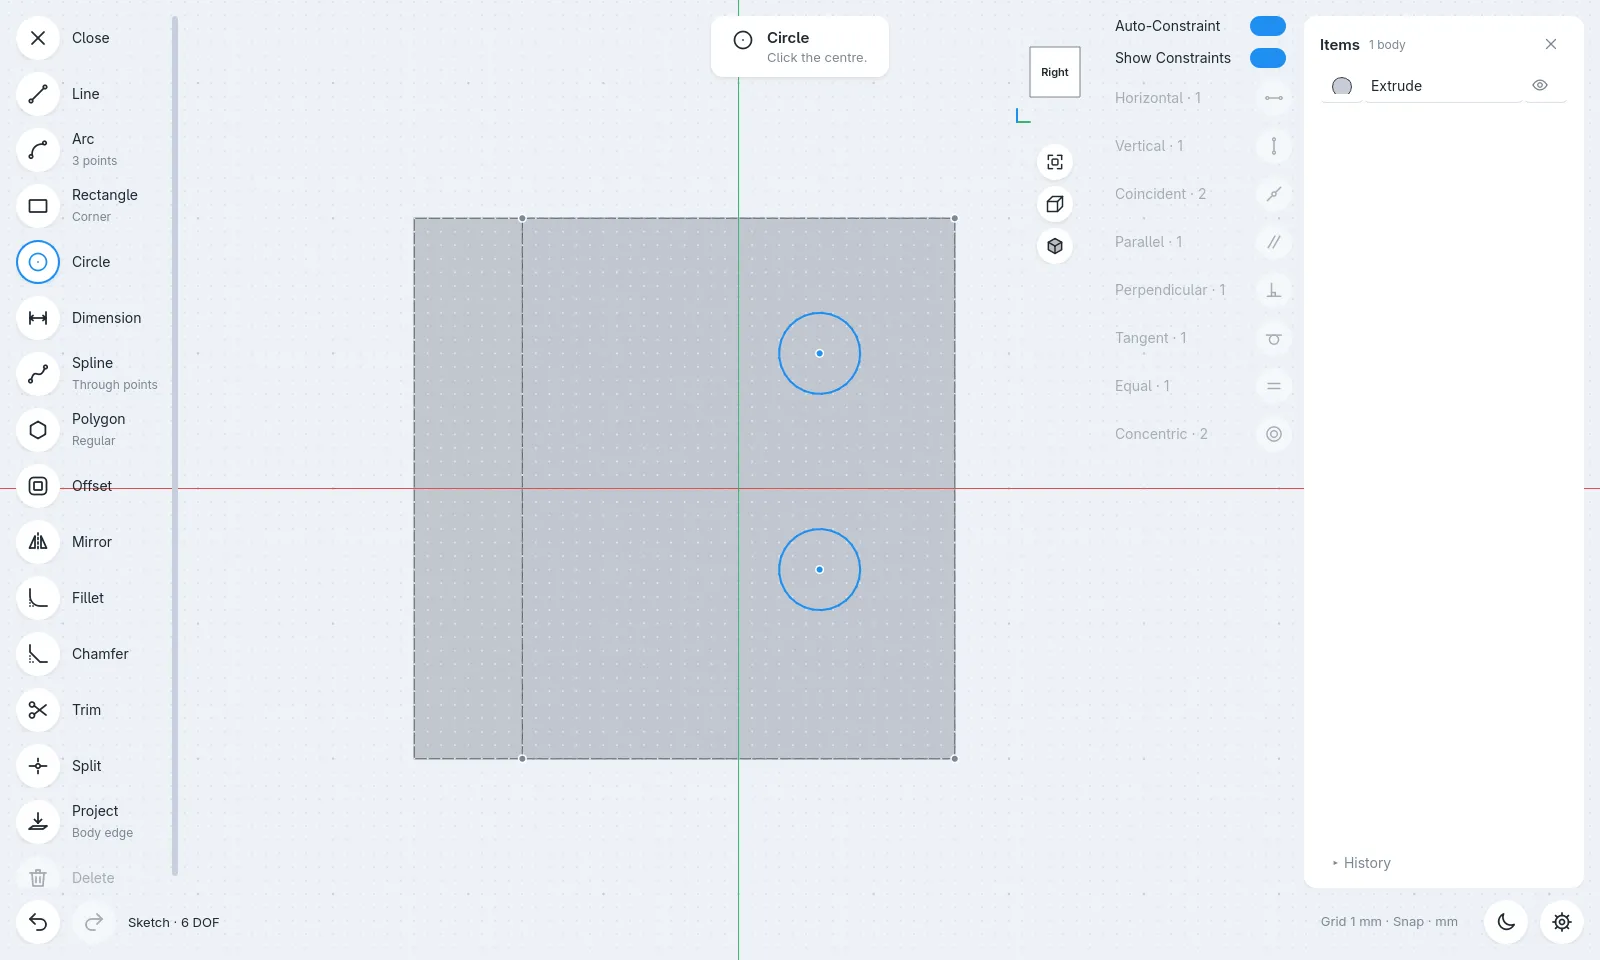
Add two holes
Press C and draw two circles, 6 mm across. Press Esc twice to leave the sketch.
CEsc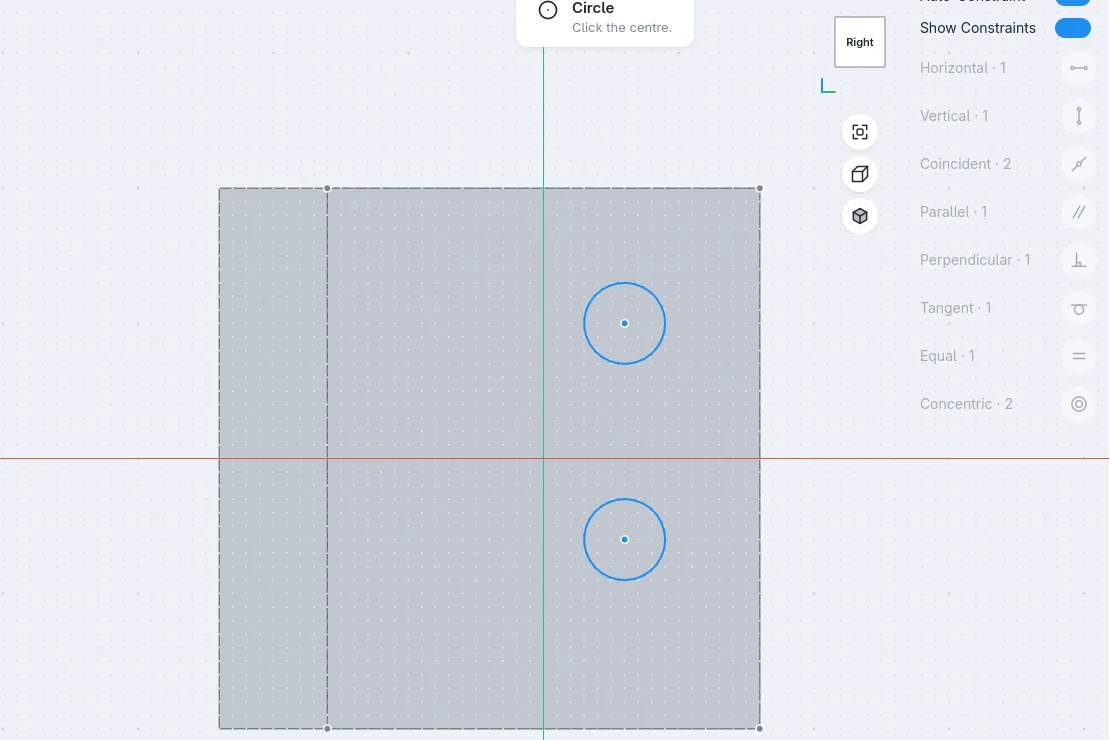
- 5
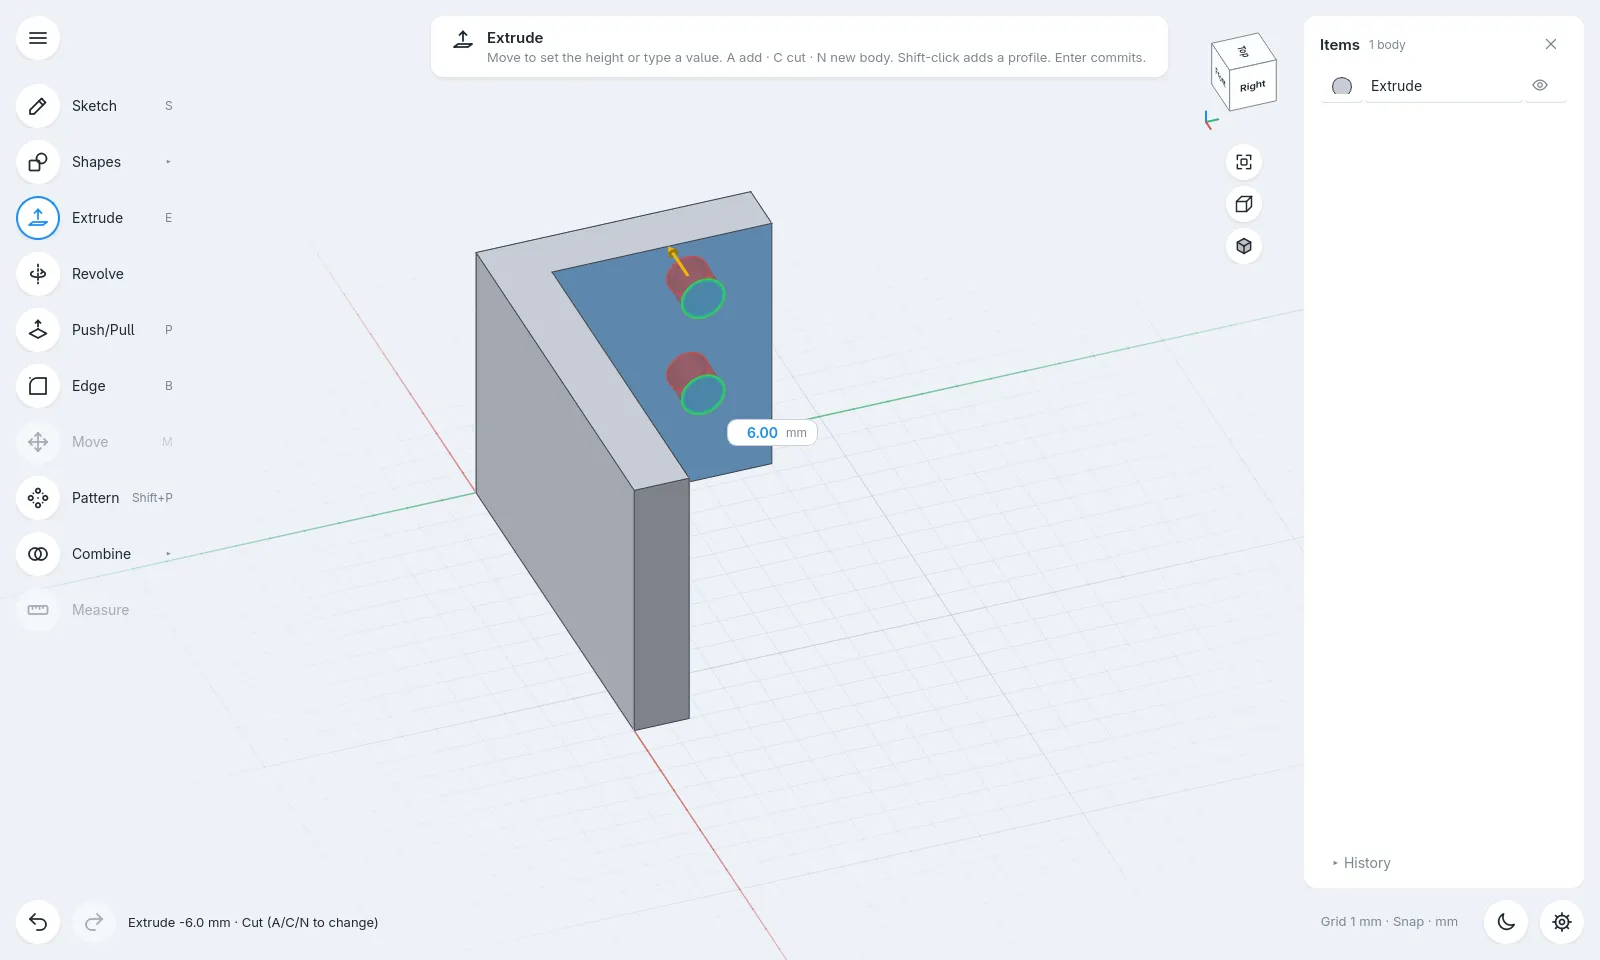
Cut them through
Click one hole, Shift-click the other, press E and push into the part. Pushing in cuts automatically. Type 8 and press Enter.
⇧ clickE8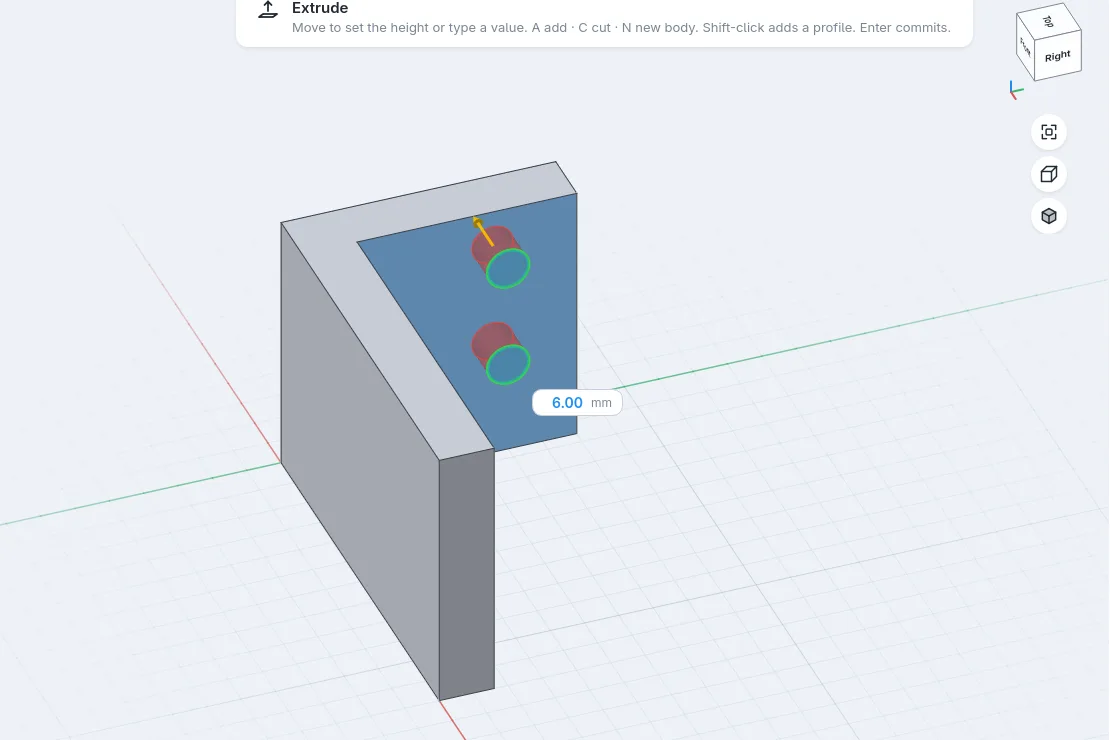
- 6
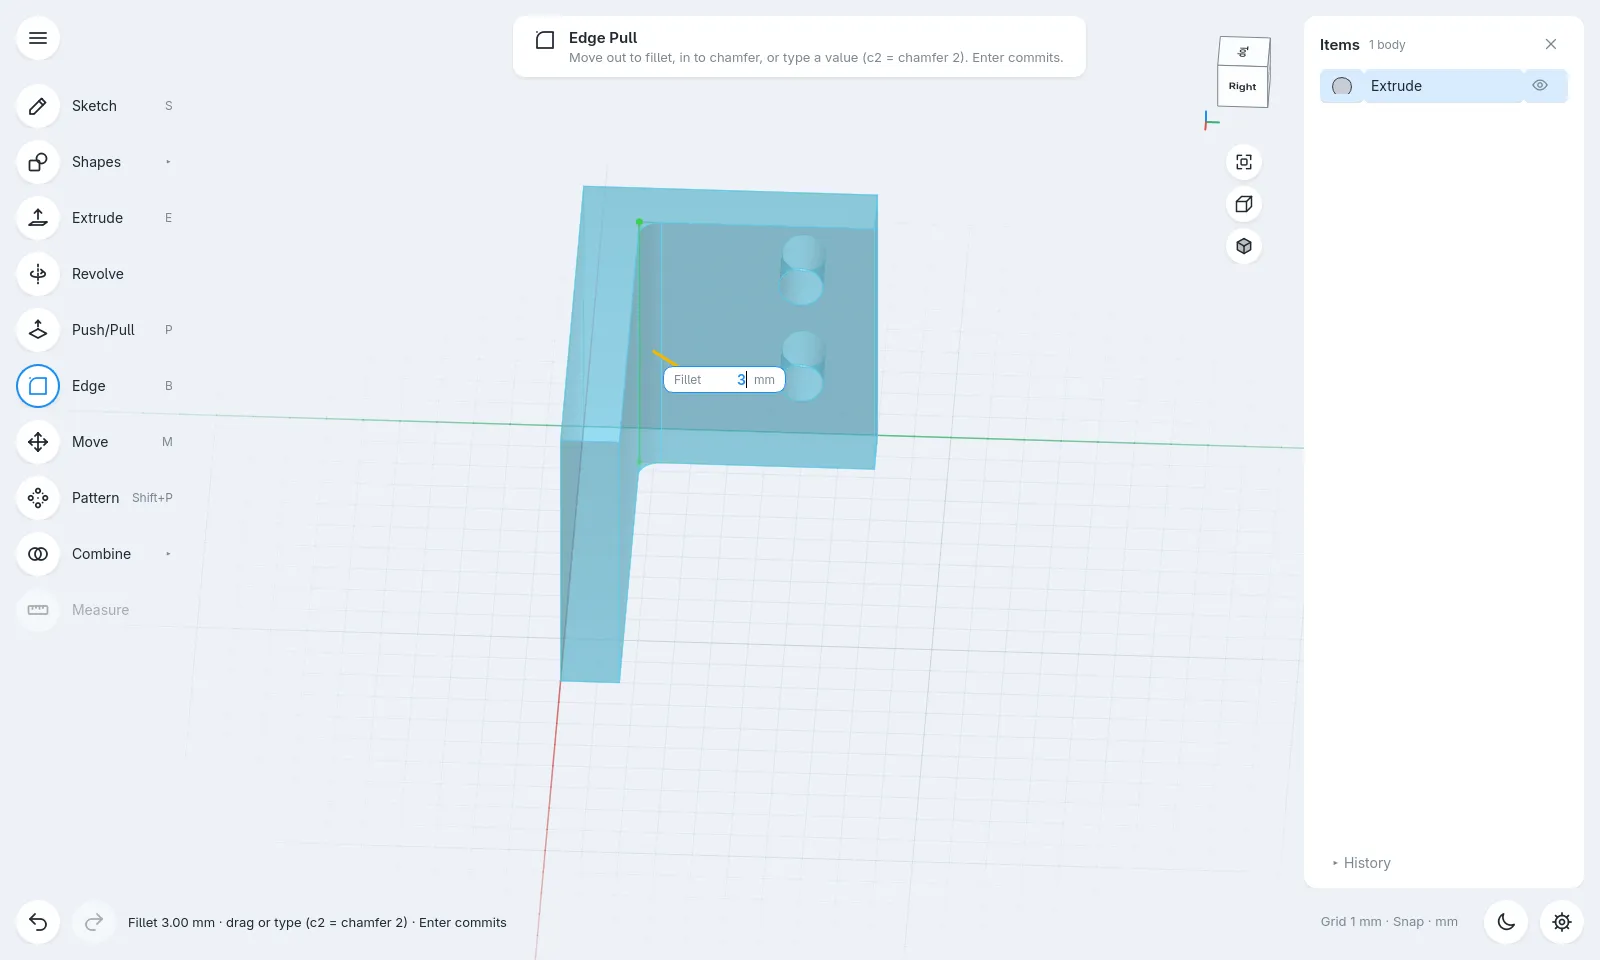
Round the inside bend
Click the inner edge of the bend. Pick Fillet on the little toolbar that appears (or press B), type 3, press Enter.
B3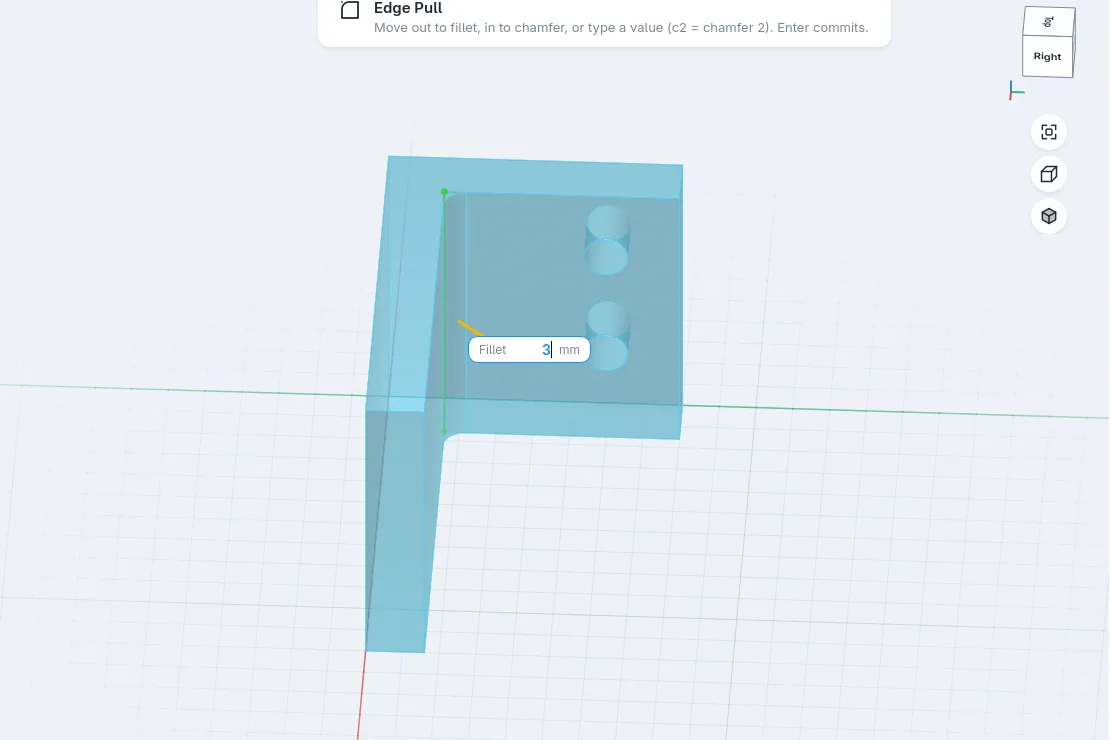
- 7
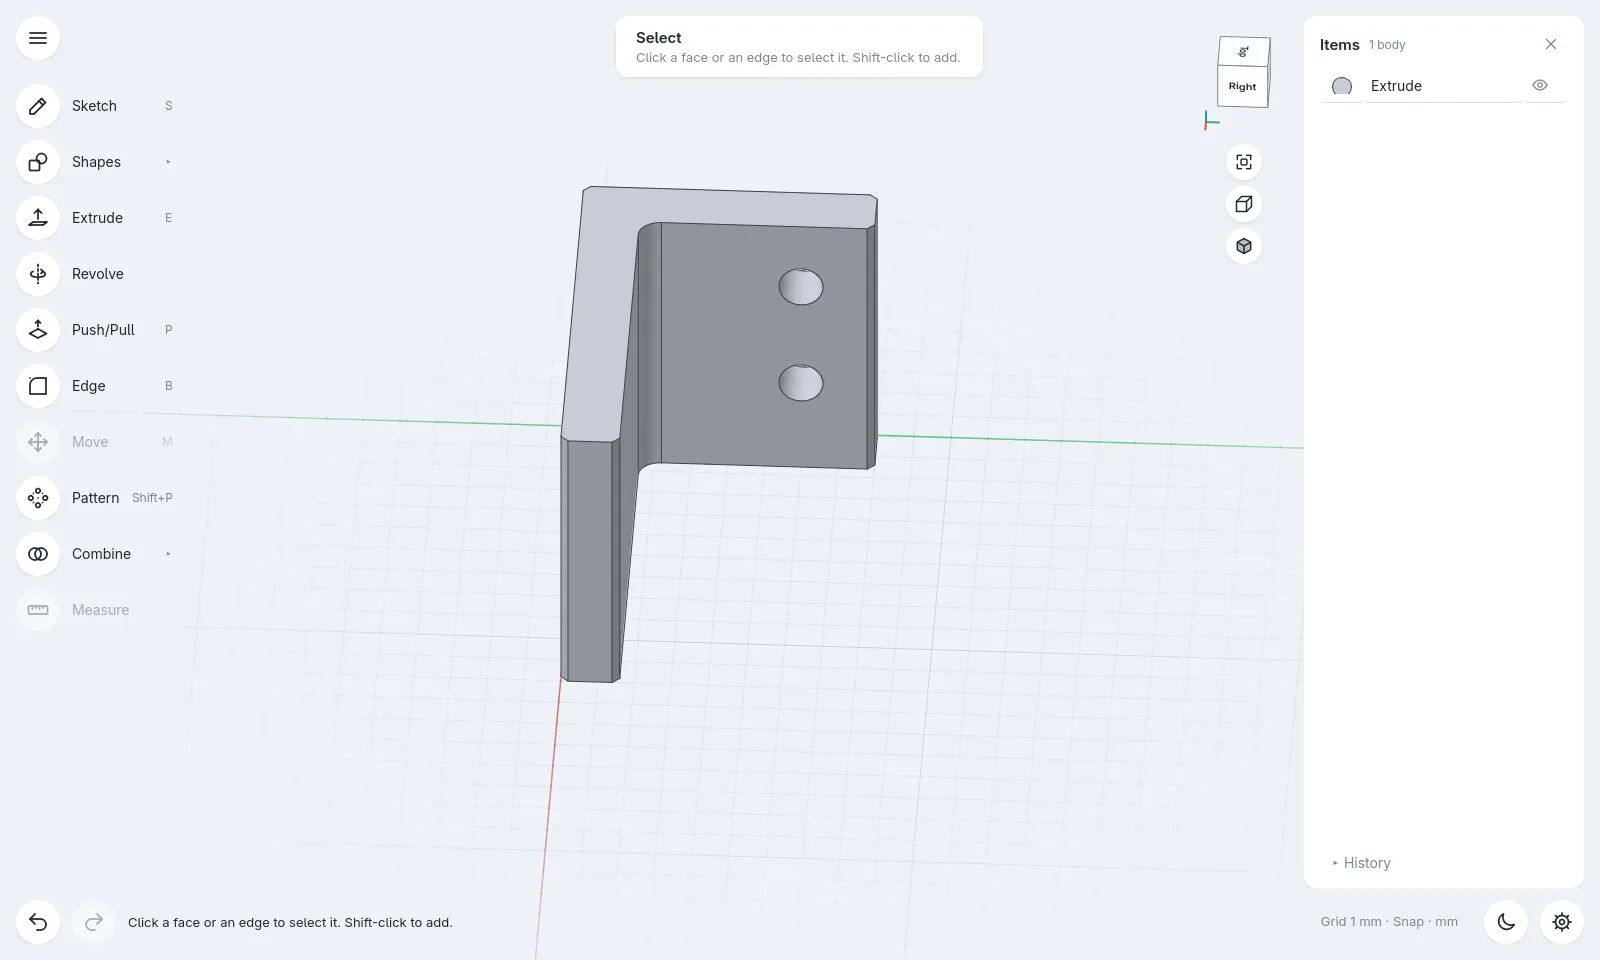
Bevel the outside and export
Shift-click the outer vertical edges, choose Chamfer, type 1. Then ≡ → Export STL or 3MF. Done: a printable bracket.
⇧ click1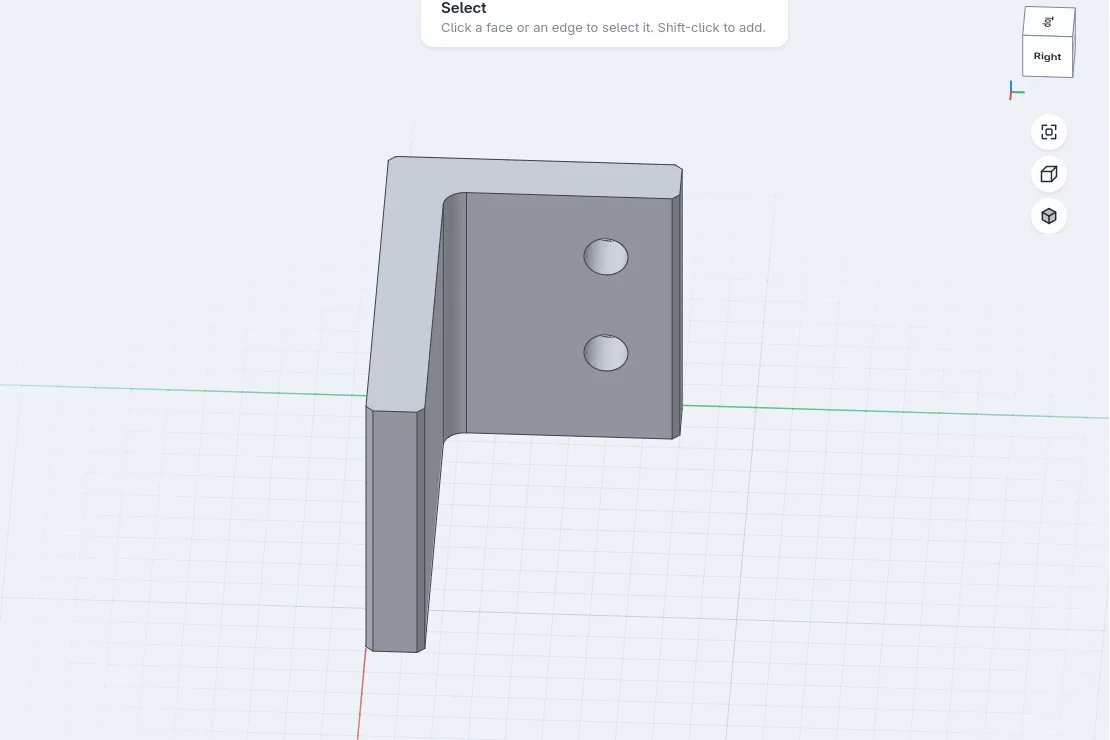
Sketches that stay put
Constraints and dimensions turn a rough drawing into an exact one. When a sketch reaches 0 DOF (degrees of freedom), nothing can move by accident.
- 1
Type the size as you draw
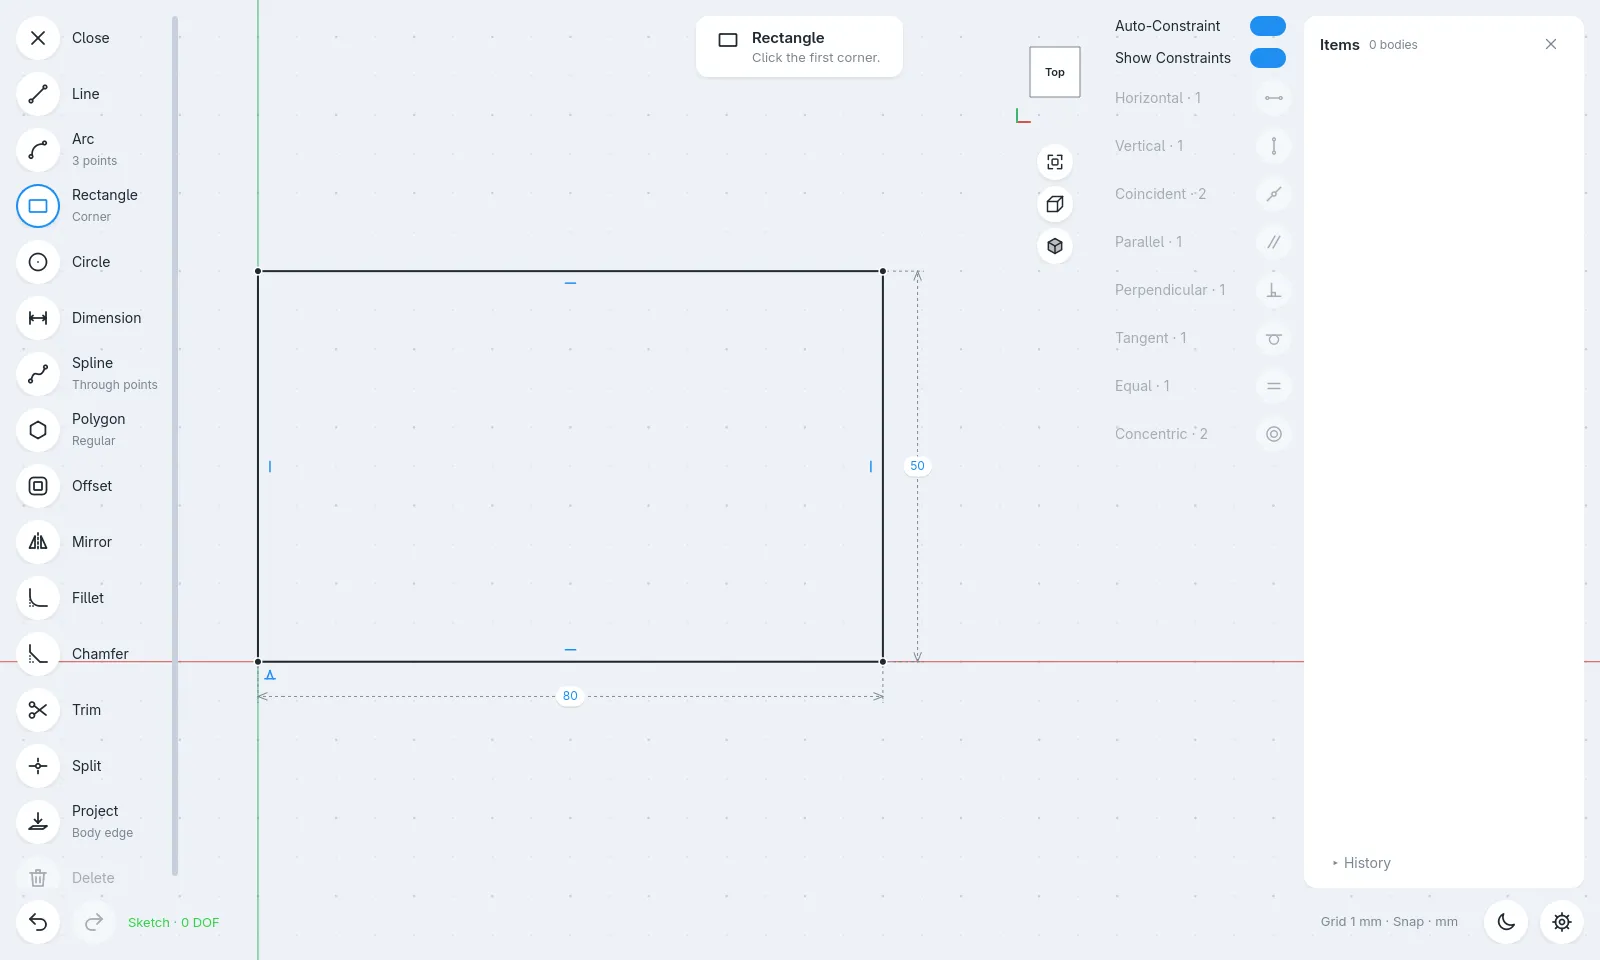
Press R, click the origin, then type 80, Tab, 50, Enter. A typed rectangle on the origin is fully locked straight away.
RTab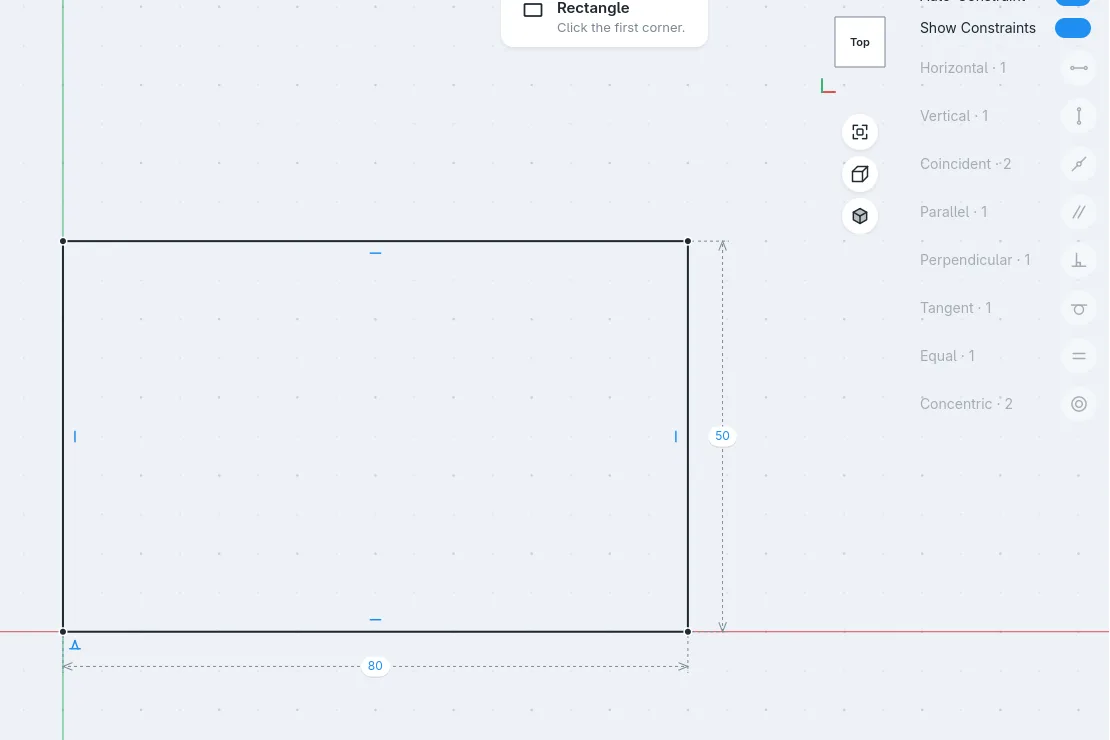
- 2
Drop in four holes
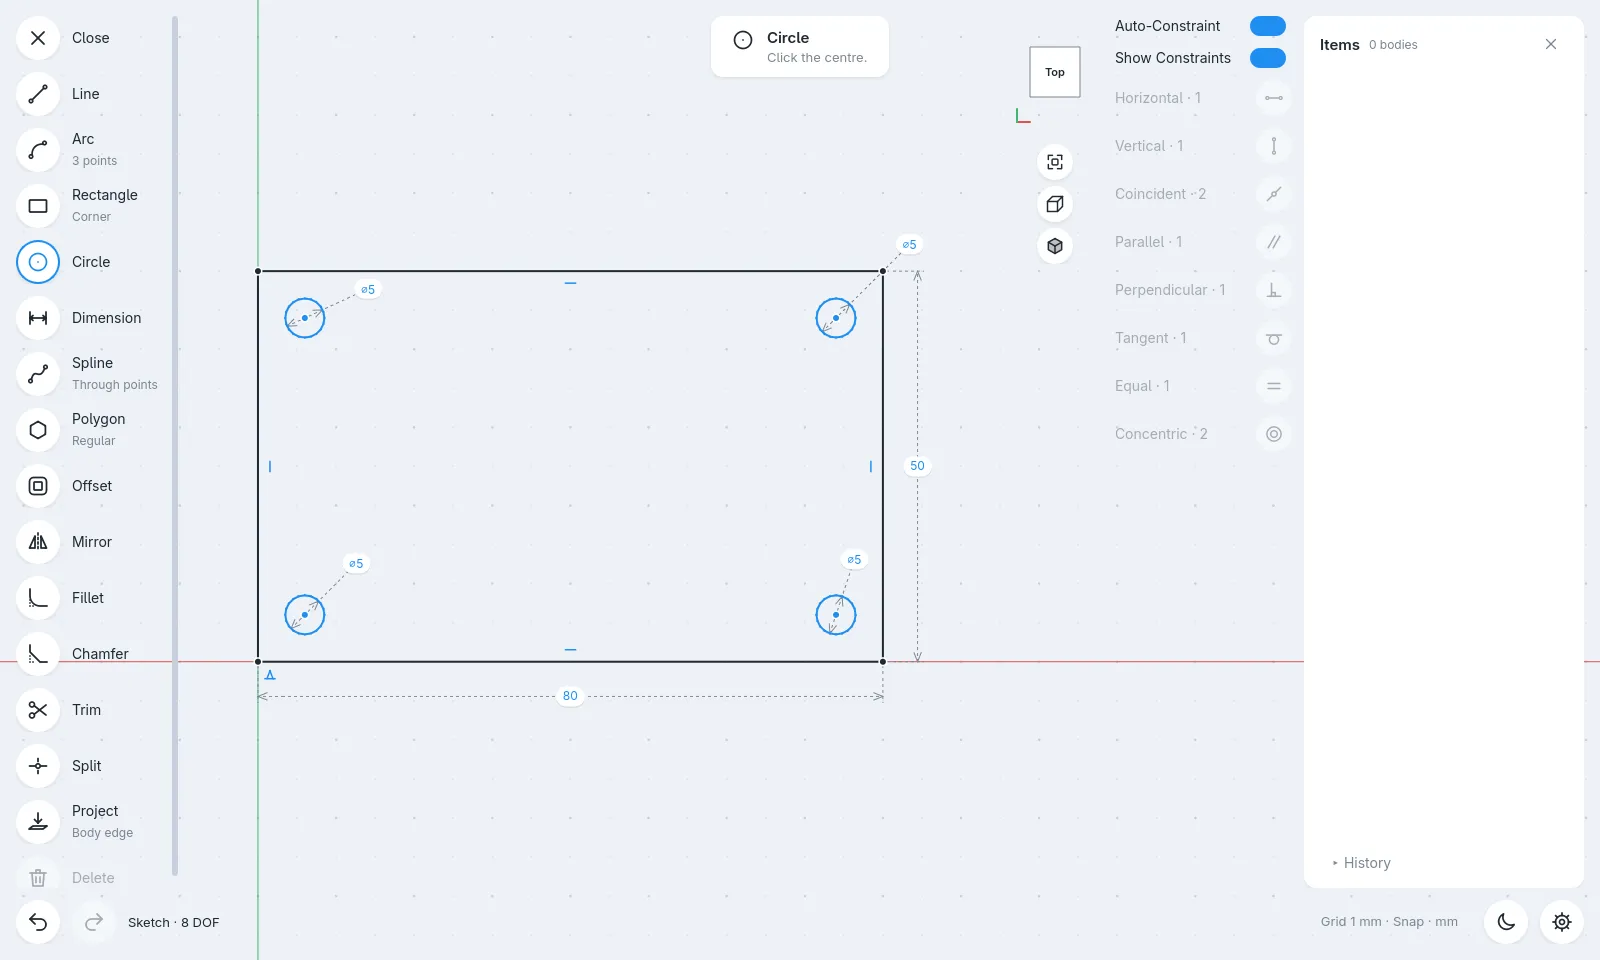
Press C, click a centre, type 5 for the diameter. Repeat in each corner. The centres are still free to move.
C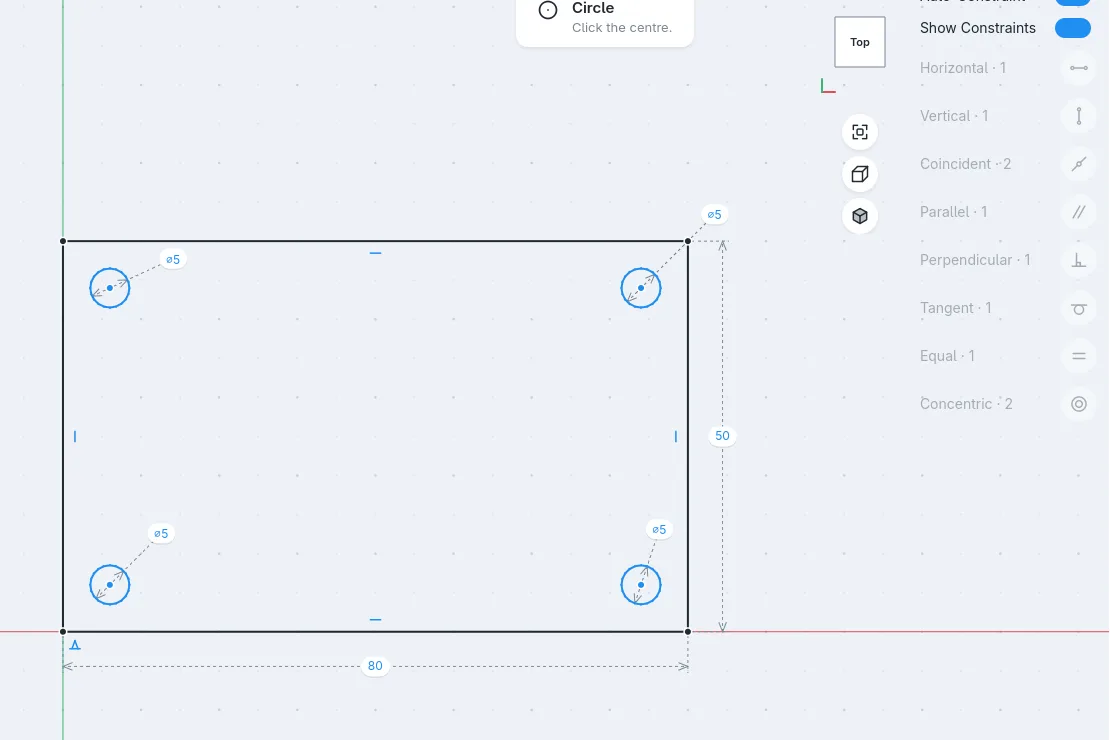
- 3
Pin them with dimensions
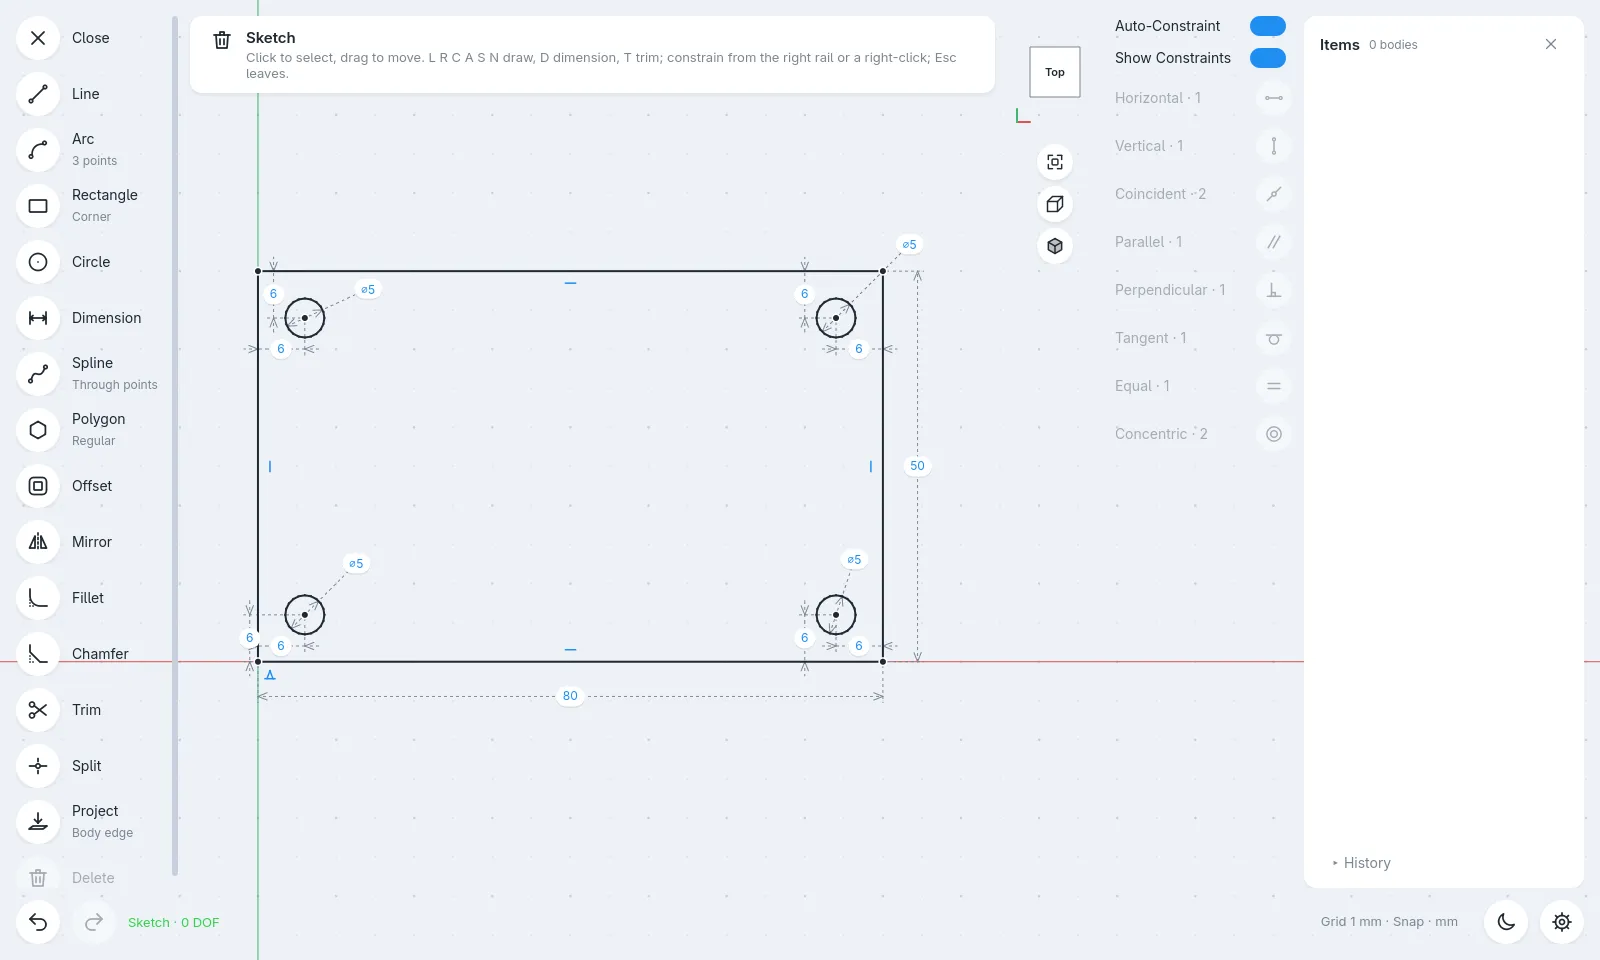
Press D, click a hole and then an edge, type 6. Do both directions for each hole. The status bar turns green at 0 DOF.
D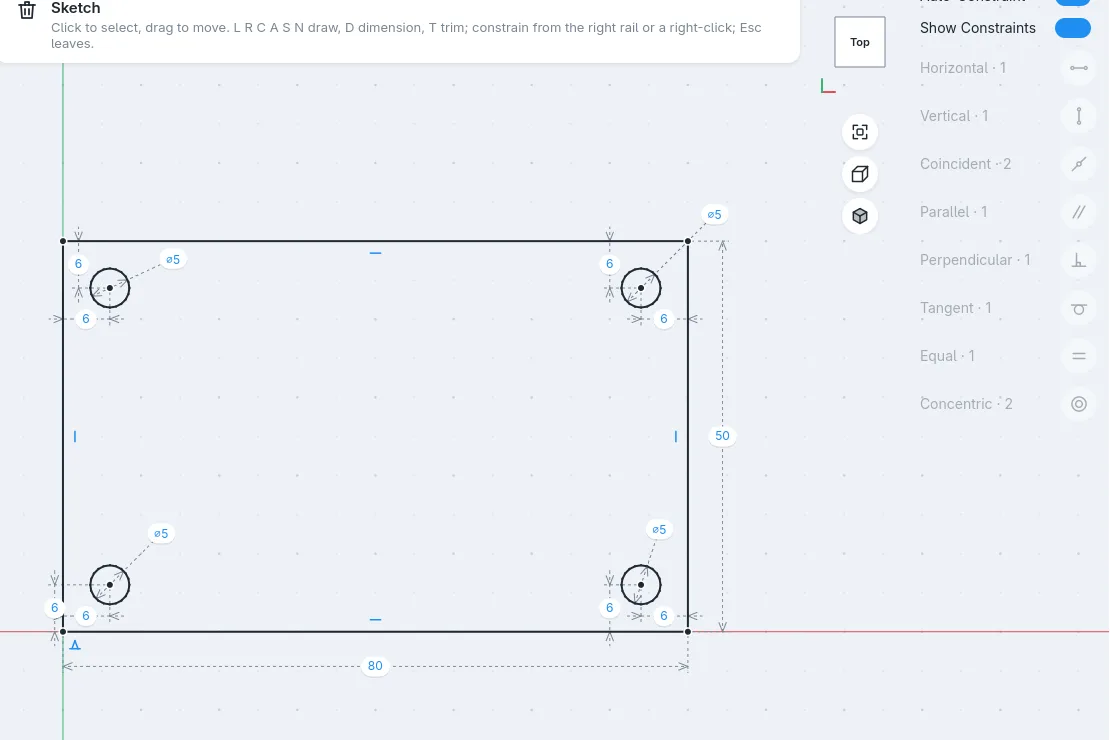
- 4
Change your mind
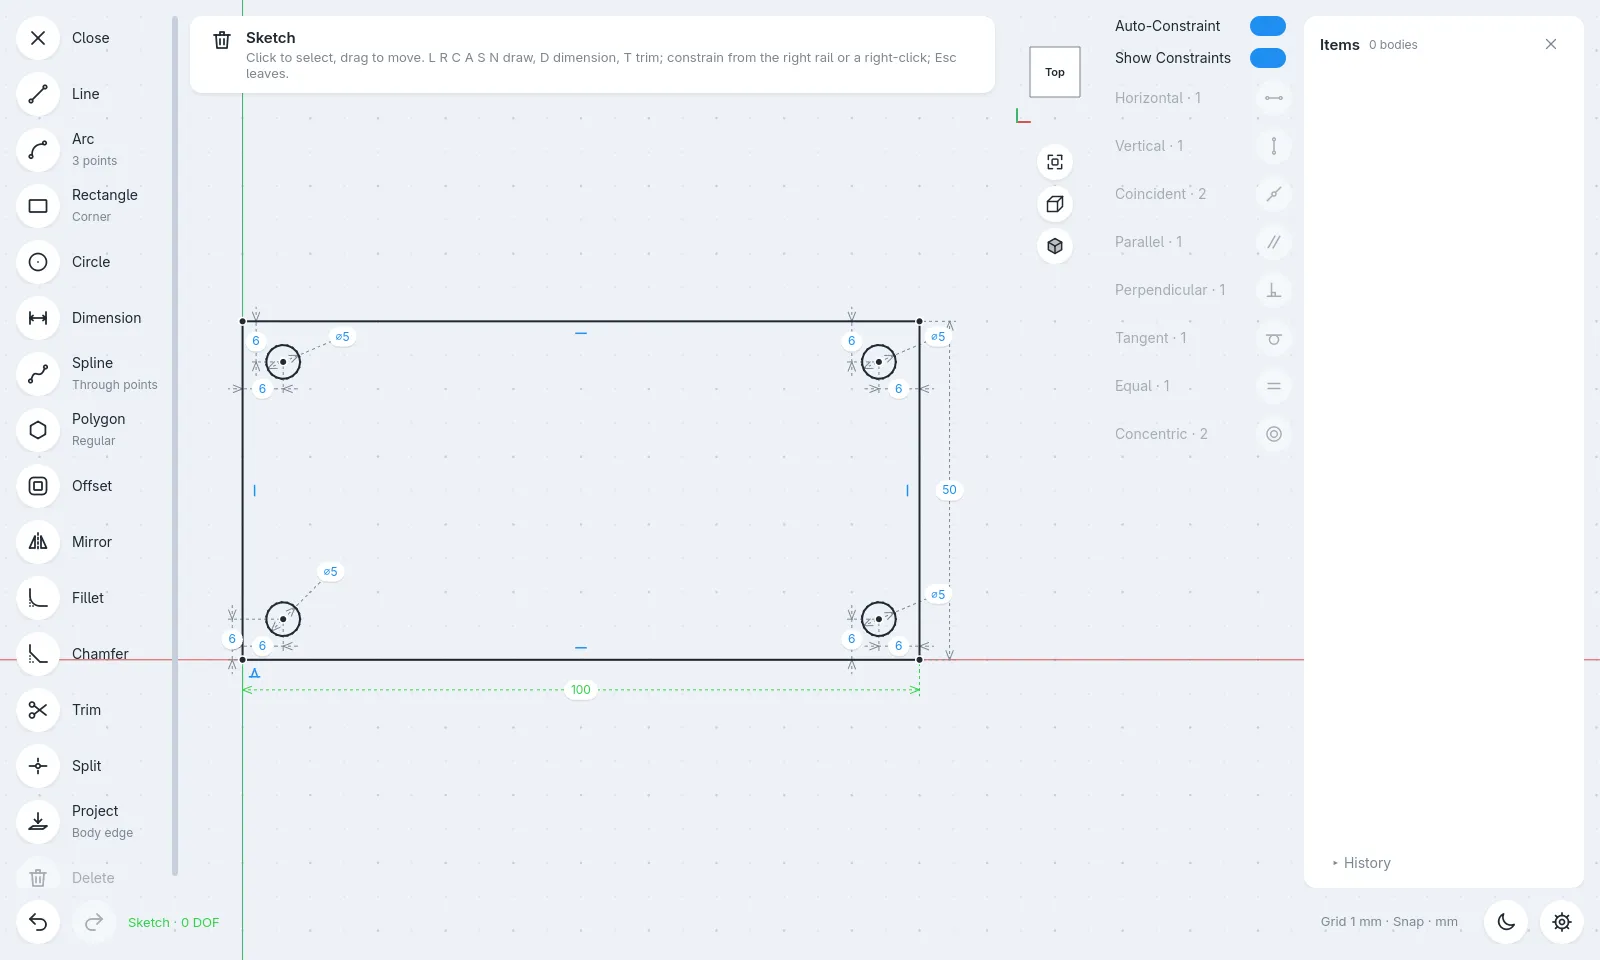
Click the 80 pill and type 100. The plate grows, and the holes stay 6 mm from the edges because you said so.
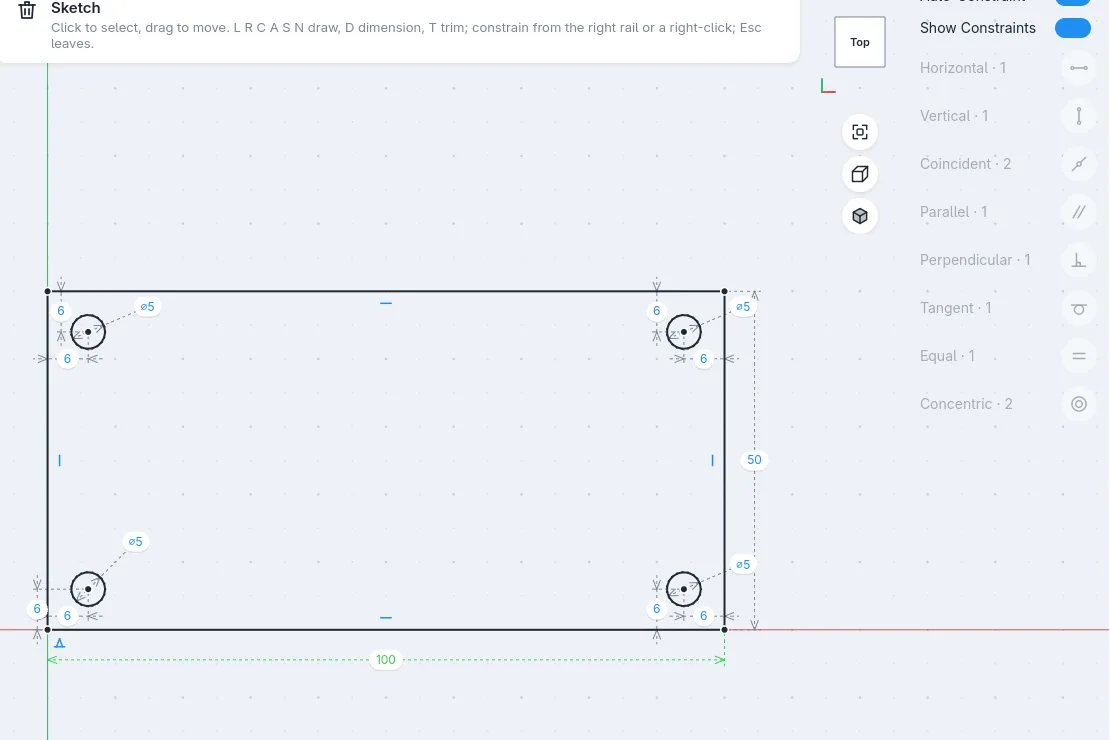
Push, pull, round
You don't always need a sketch. Drop a shape and shape it with your hands: faces push and pull, edges round and bevel.
- 1
Drop a box, pull an edge
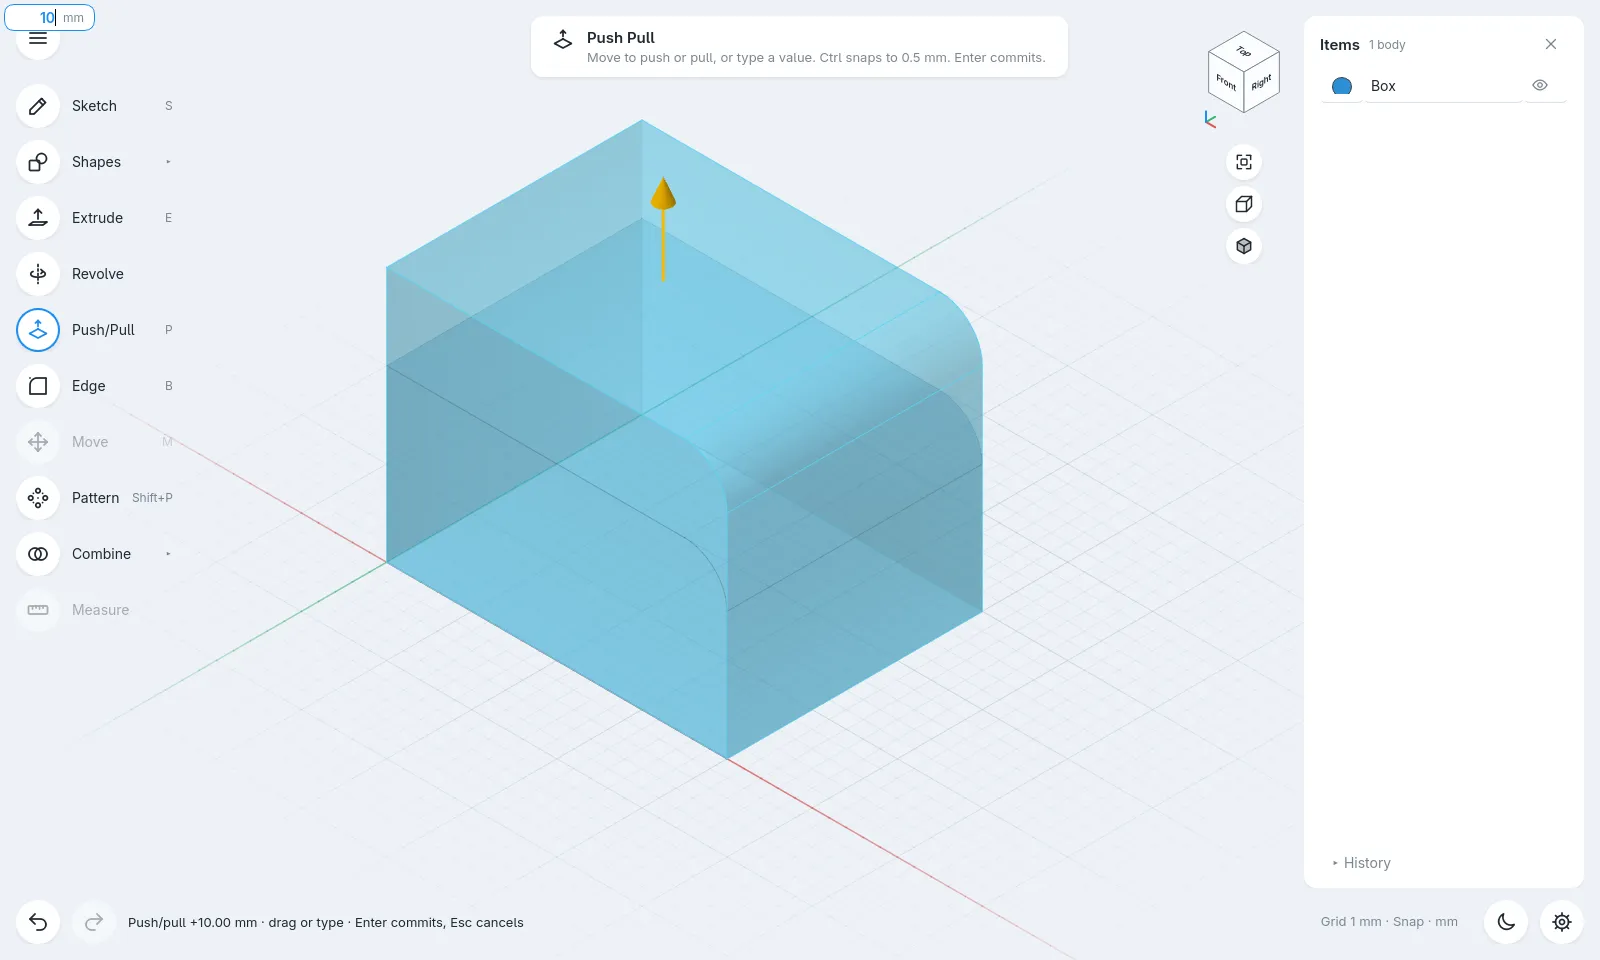
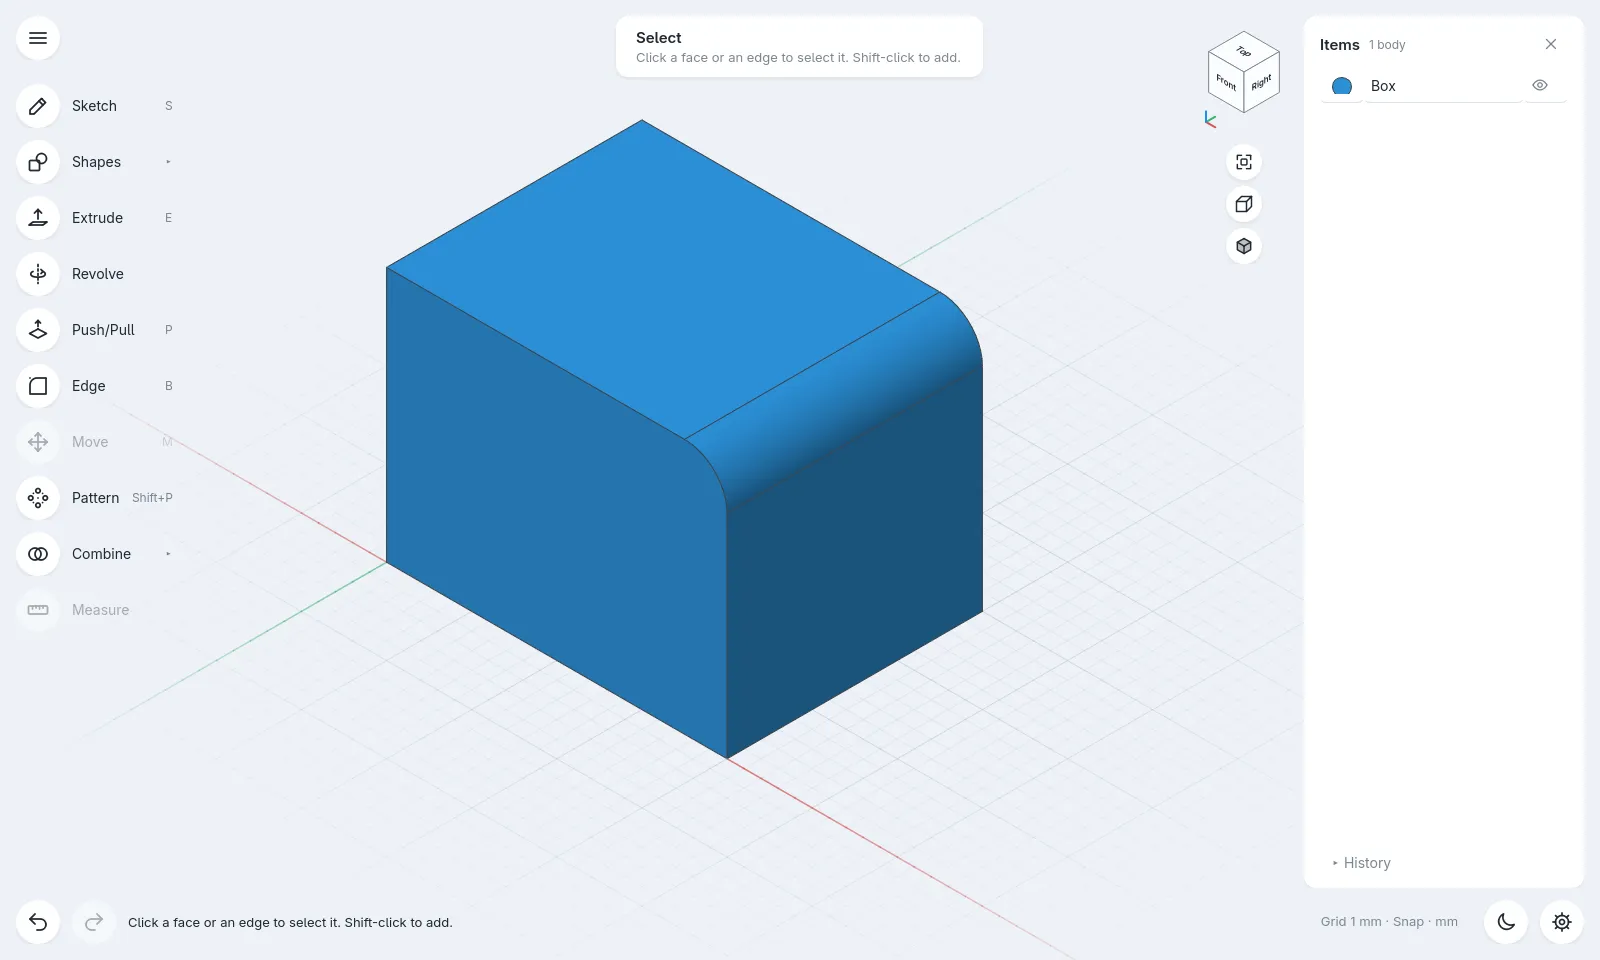
Shift+B drops a box: click, type 40, Tab, 30, Tab, 20. Then drag a top edge outward and it becomes a fillet.
⇧B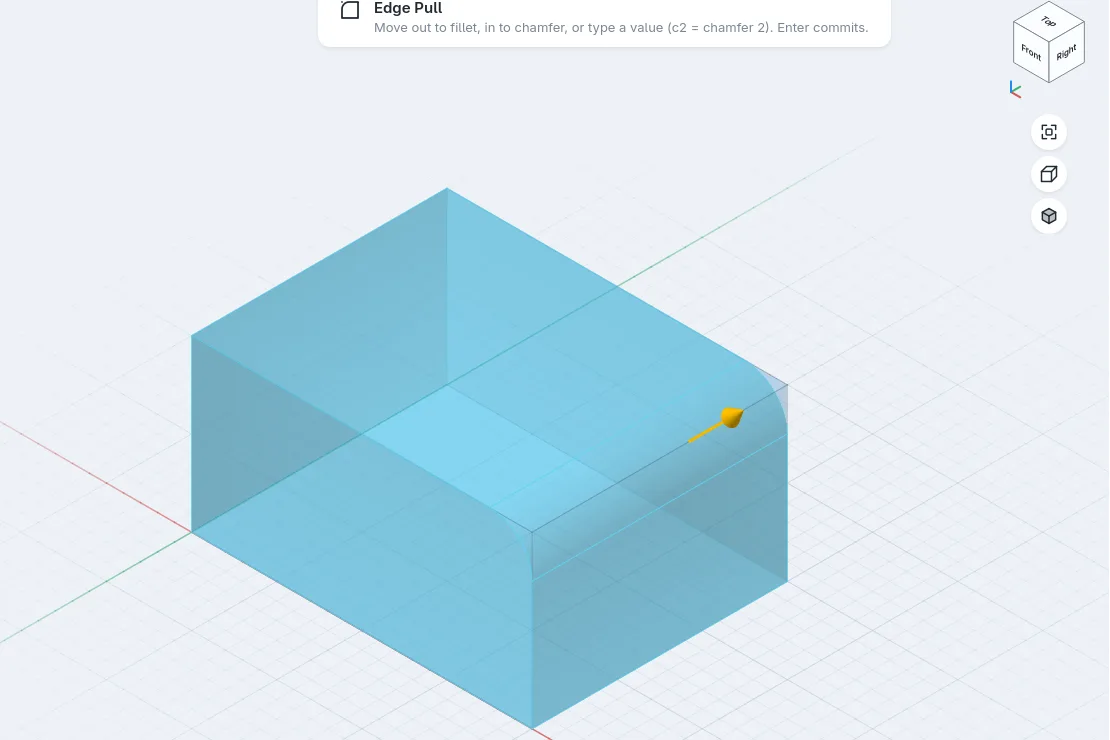
- 2
Push the face
Drag the top face up (or press P with it selected). The fillet rides along. Ctrl snaps to 0.5 mm.
P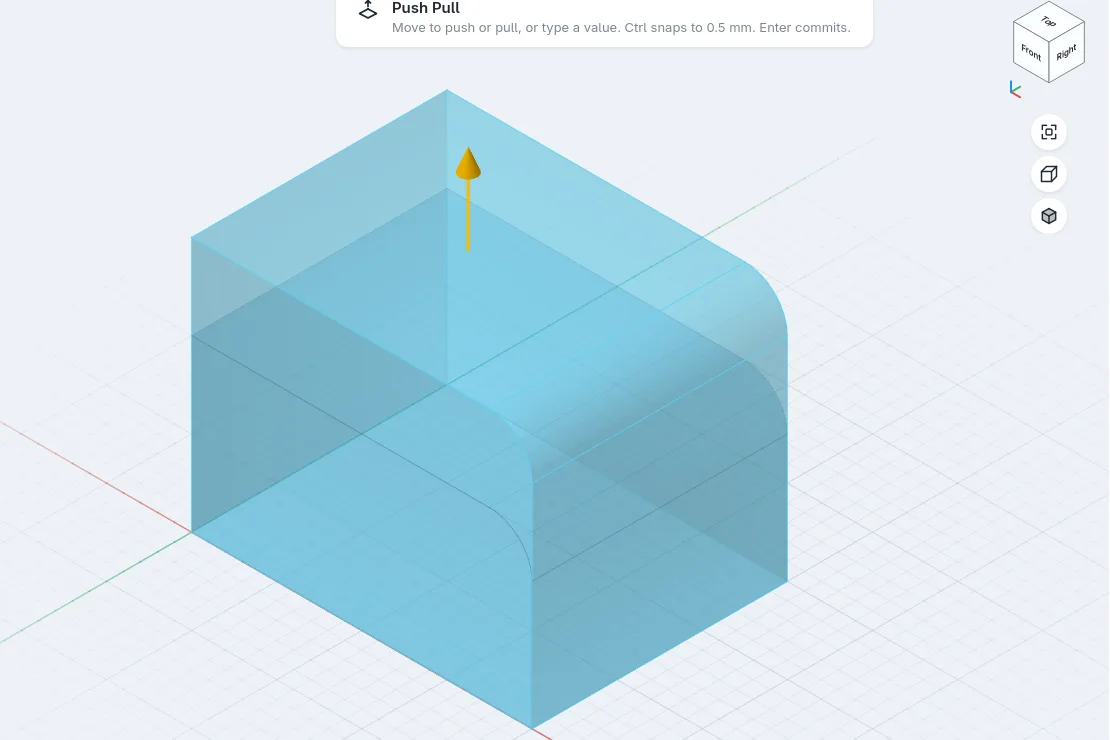
- 3
Done, and still editable
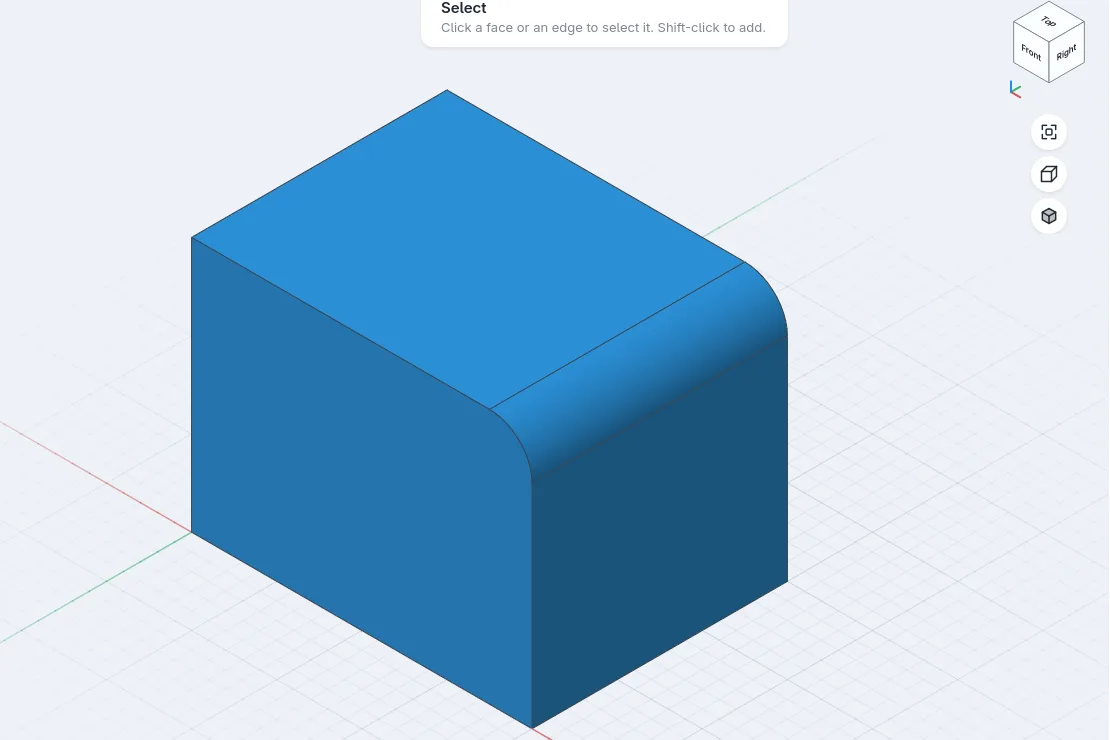
Every gesture lands in the history as a normal step, so you can change it later.
Turned parts with Revolve
Pins, knobs, vases and wheels: draw half the profile and spin it.
- 1
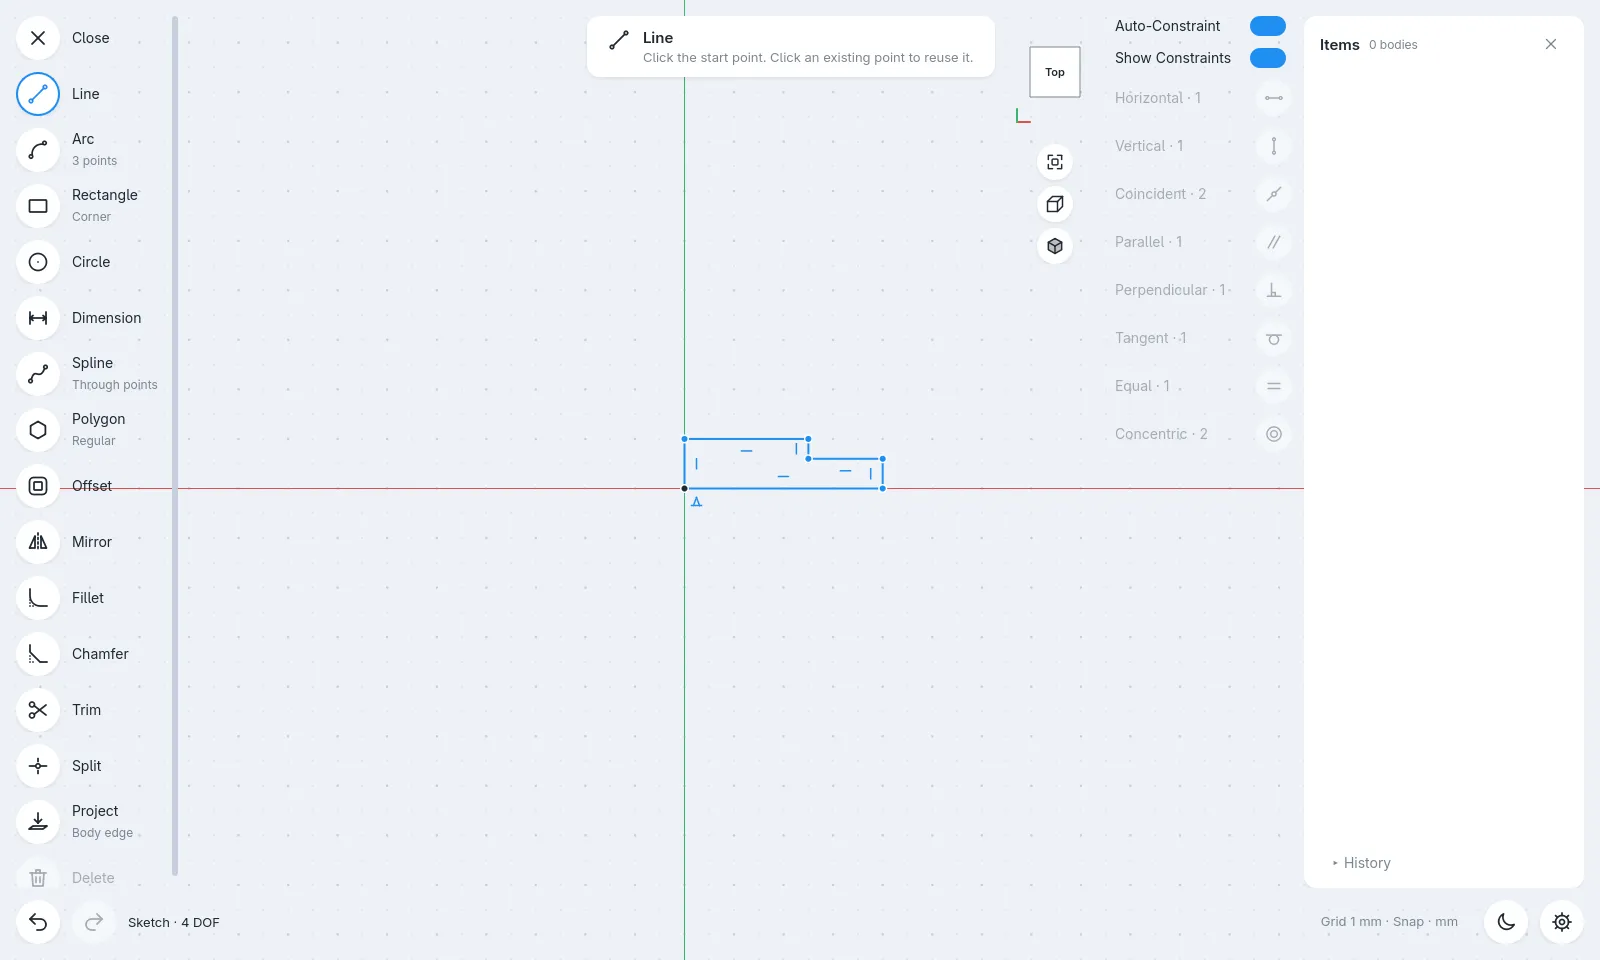
Draw half the section
Sketch the outline of half the part, with one edge on the centre line.
SL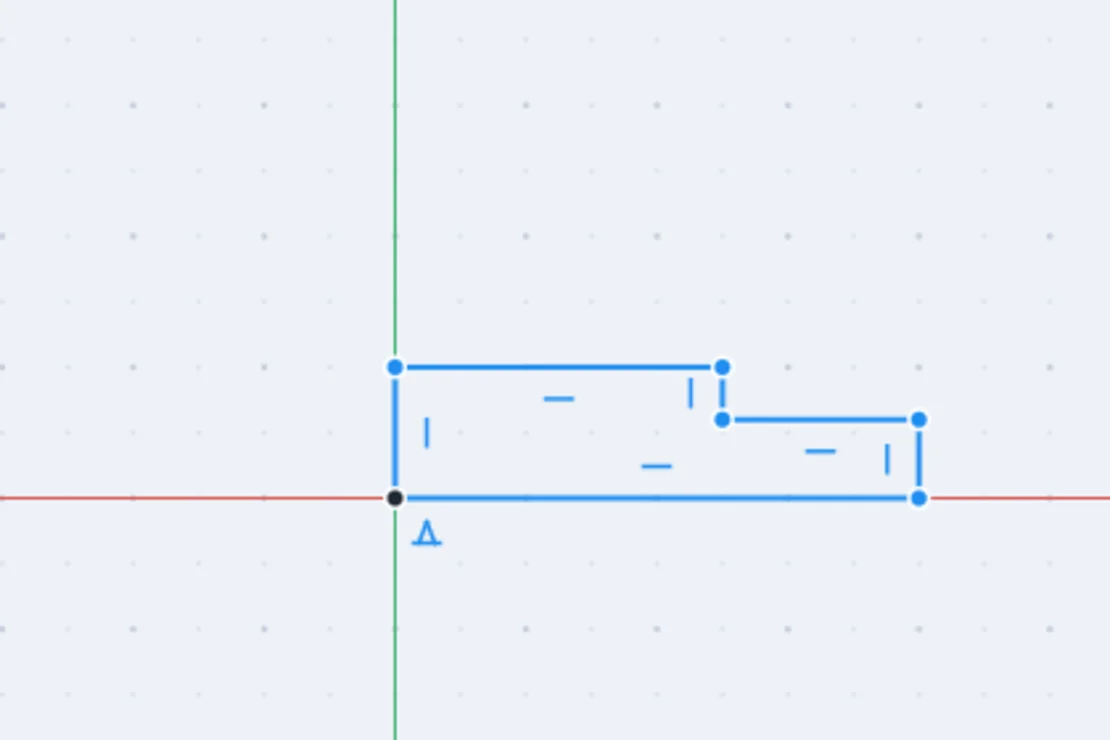
- 2
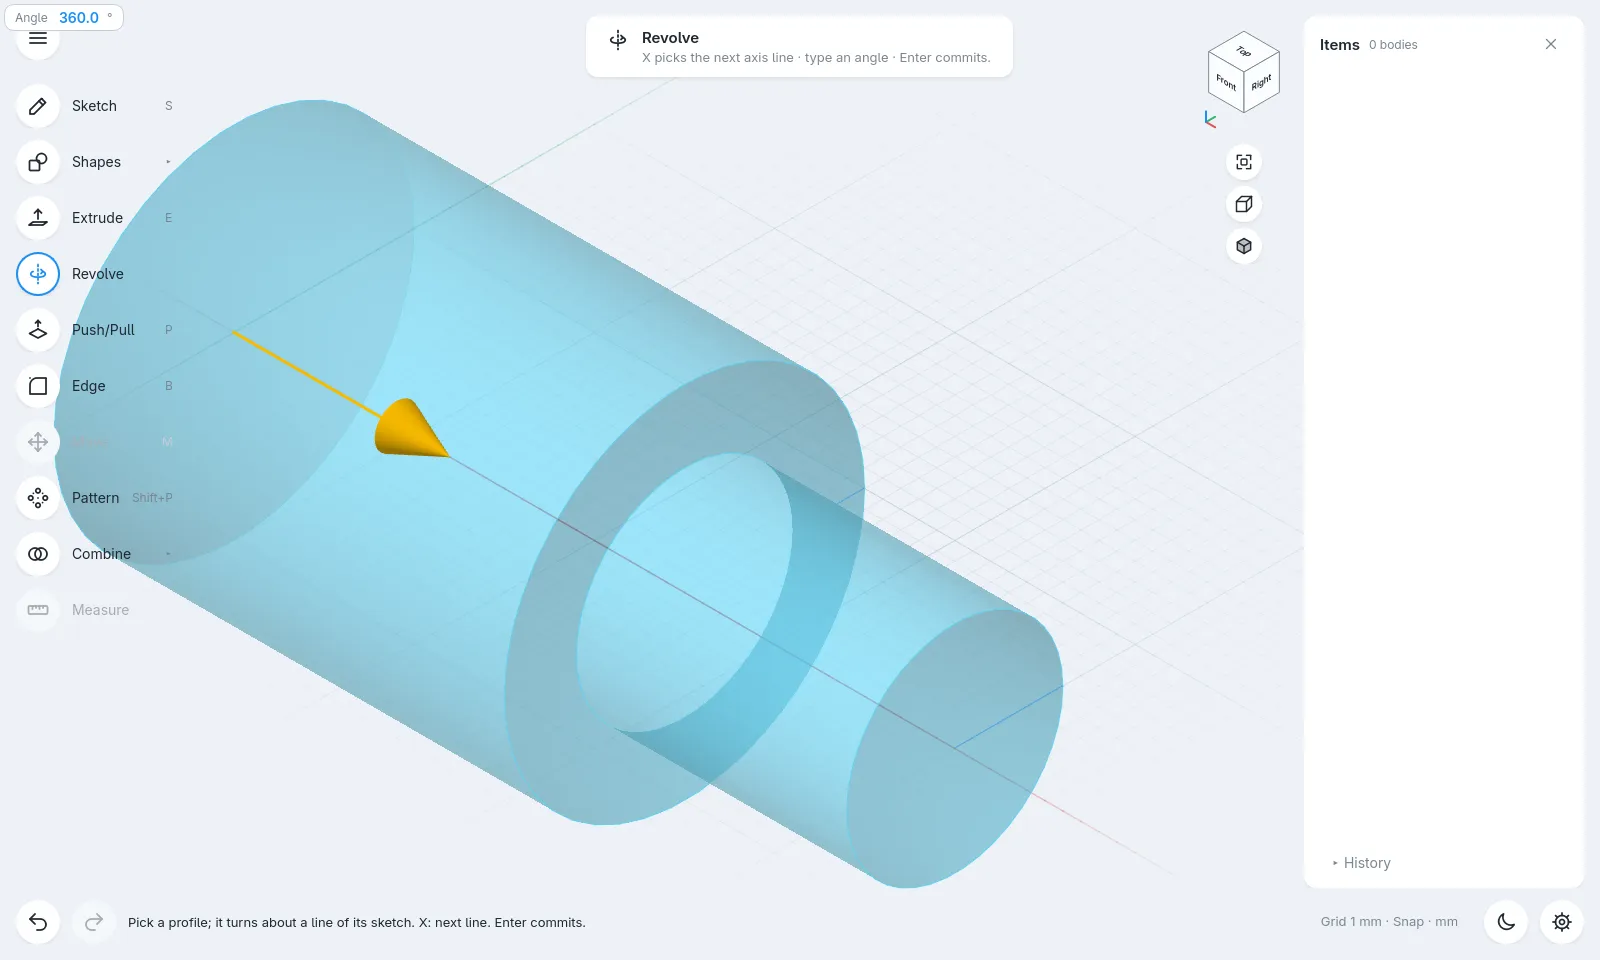
Revolve
Click Revolve on the left rail. formbar guesses the centre line; press X to try the next line if it guessed wrong.
X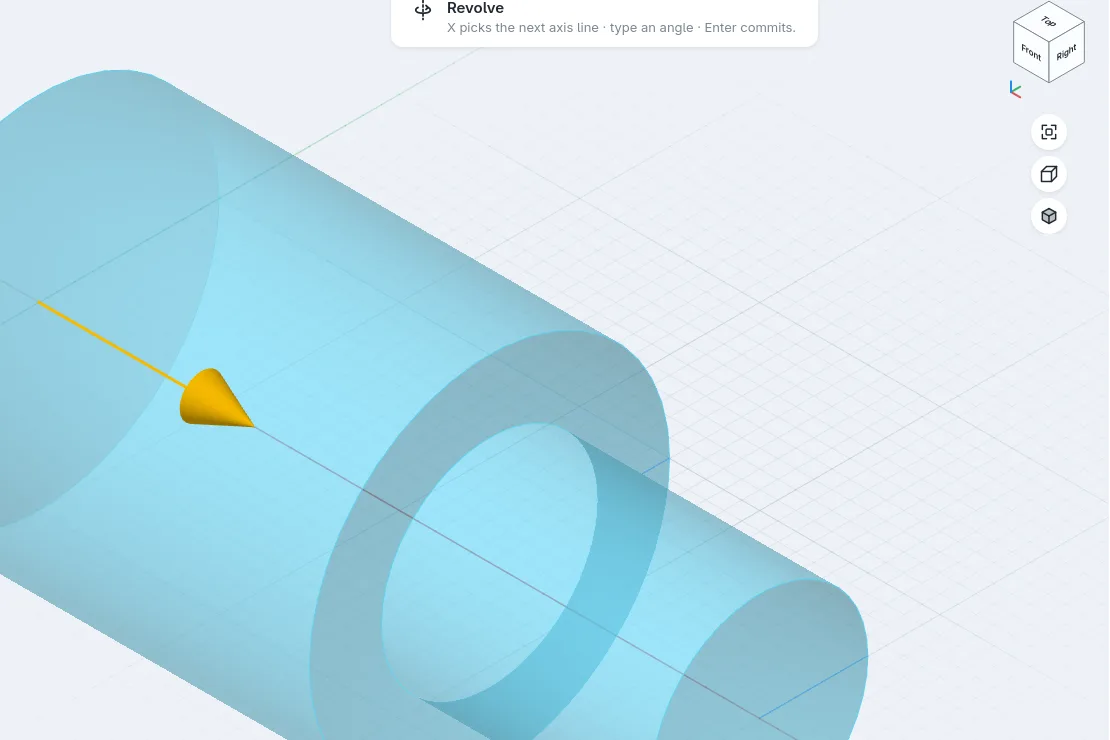
- 3
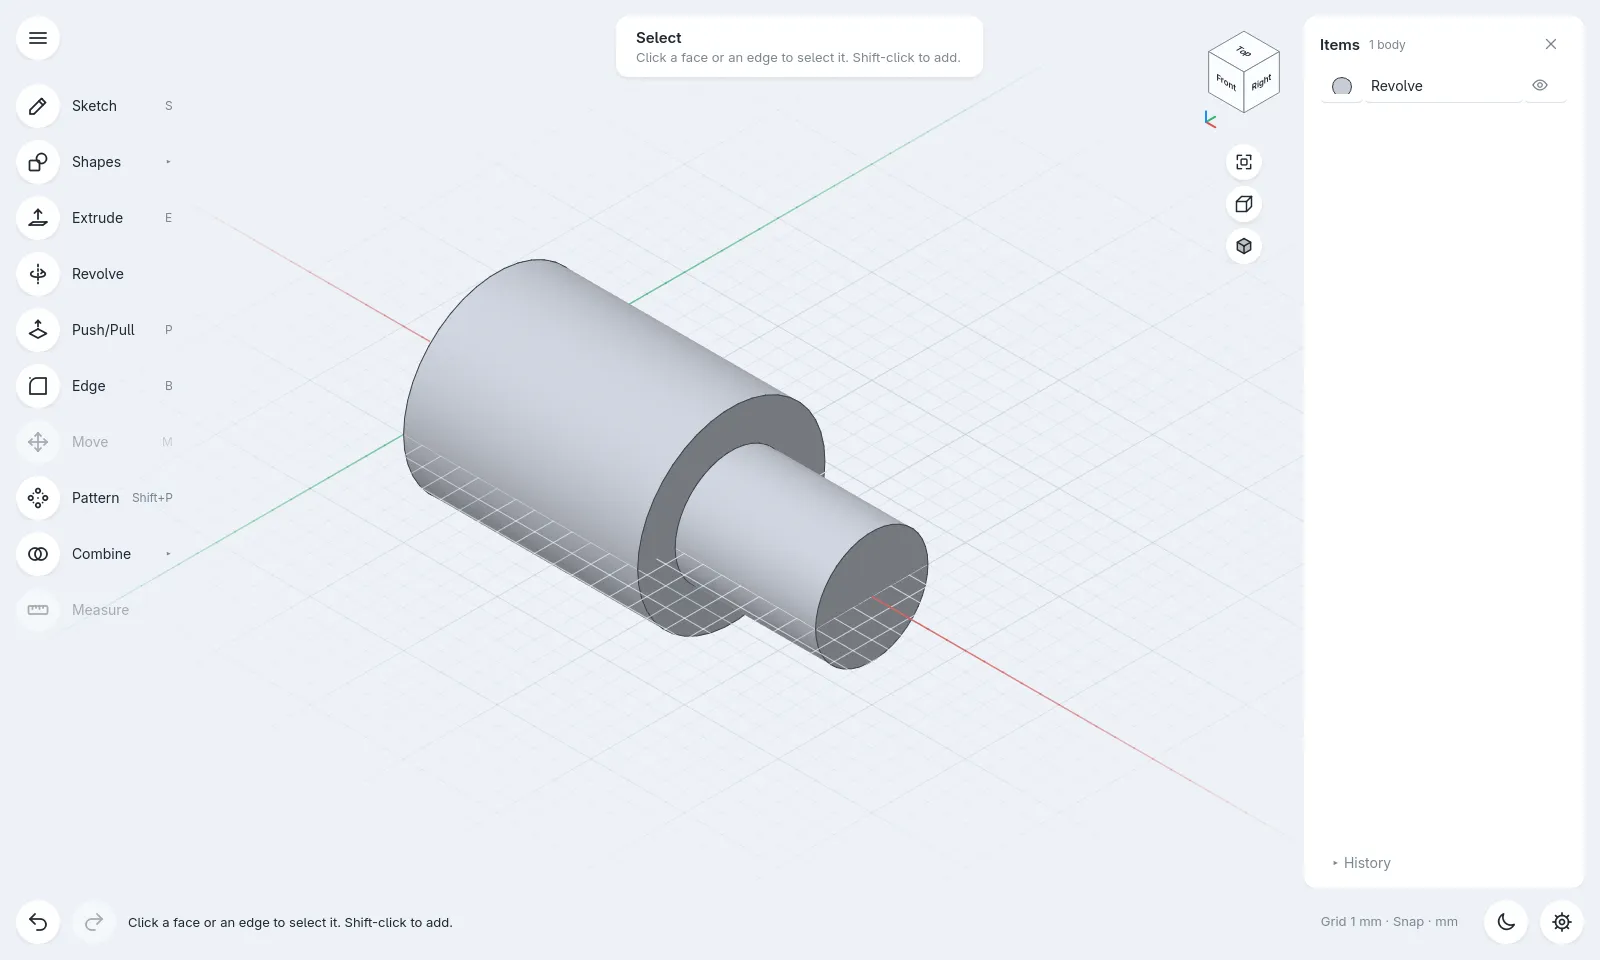
Enter, and it's solid
Type an angle for a partial turn, or press Enter for a full 360°.
Enter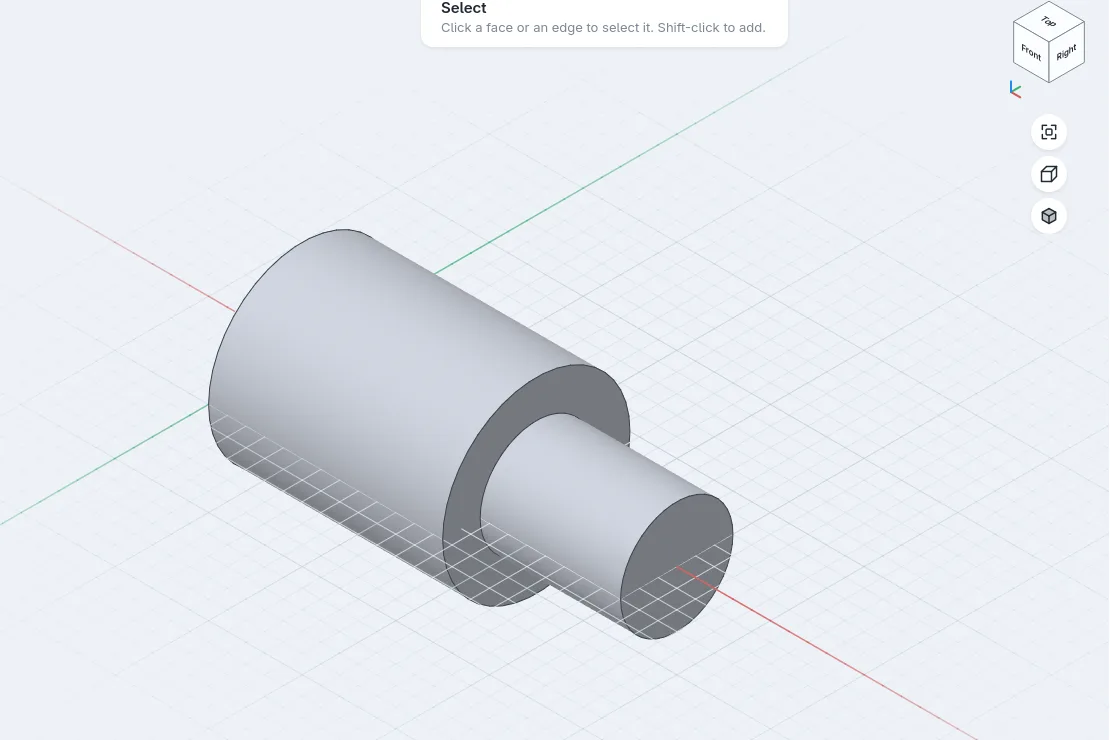
Patterns: one hole, twelve holes
Model one feature, then repeat it around an axis or along a line.
- 1
Pattern around the bore
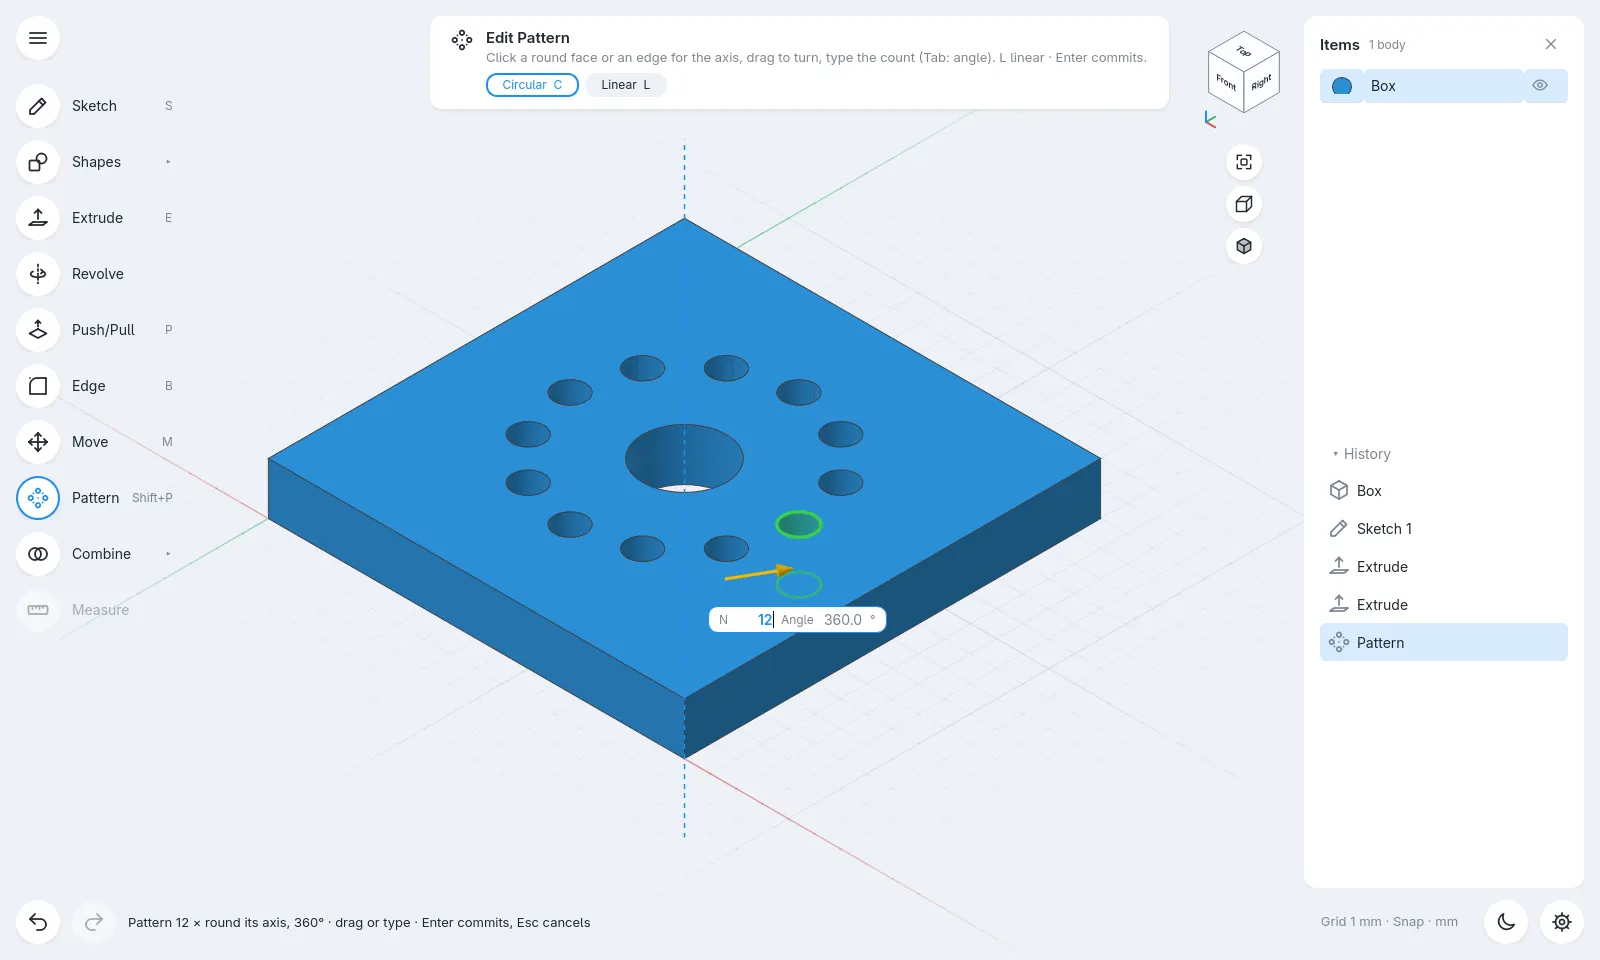
Select the hole and press Shift+P. Click the bore's wall to use it as the axis, then drag or type a count.
⇧P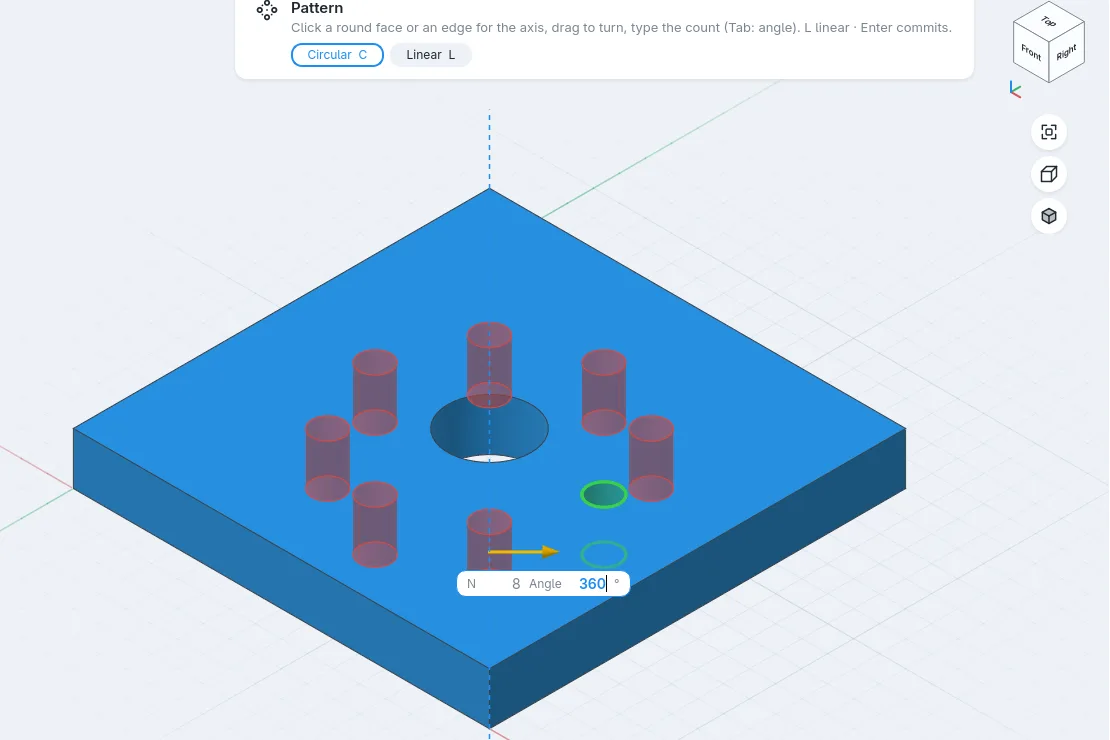
- 2
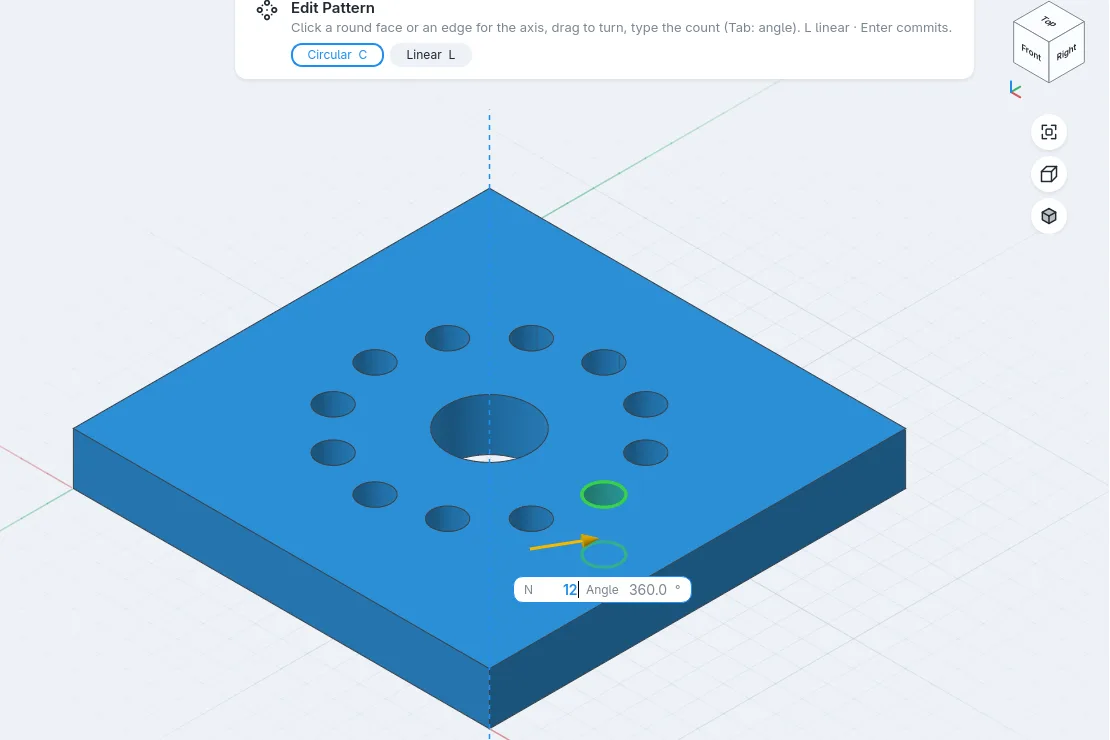
Change the count any time
Double-click the Pattern step in History and type 12. Up and Down add or remove one copy.
↑↓
- 3
Or in a straight line
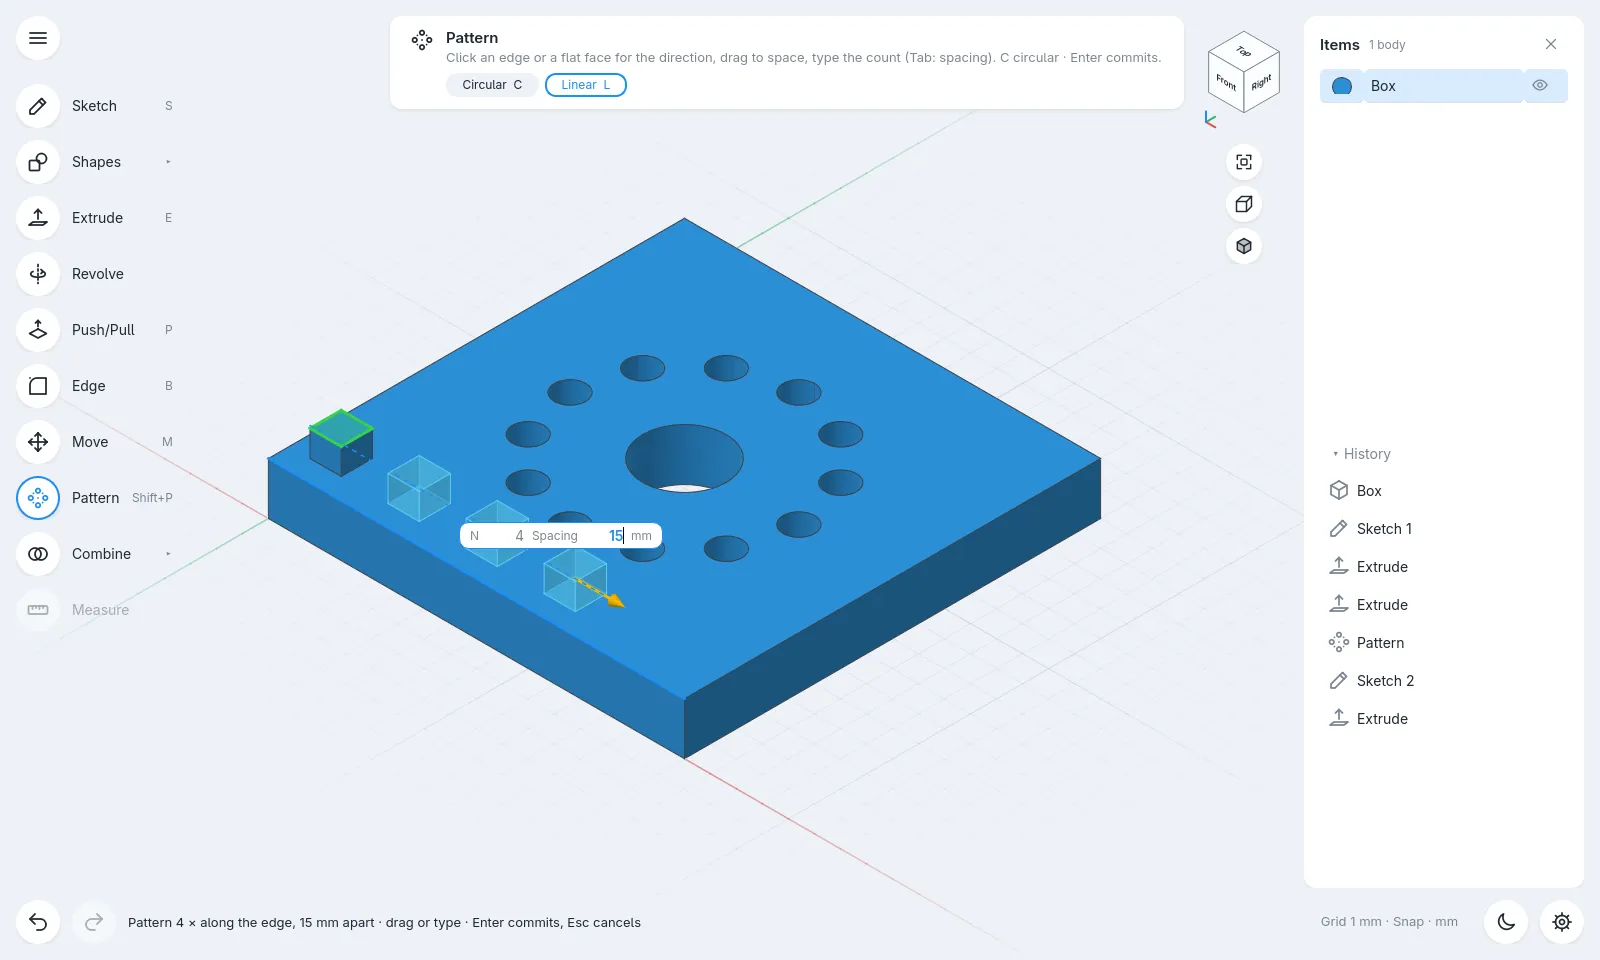
Press L (or the Linear pill) for a row: count 4, Tab, spacing 15.
LTab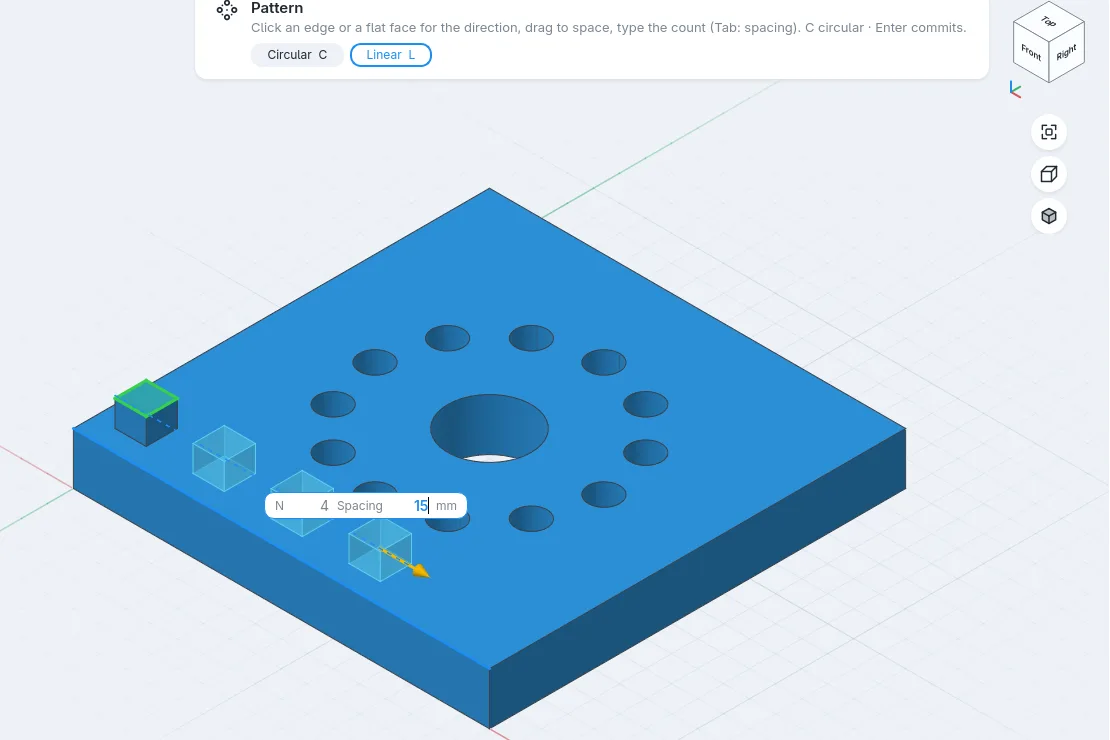
History and parameters
Everything you do is a step you can go back to. Change an early size and the rest of the part follows.
- 1
Open History
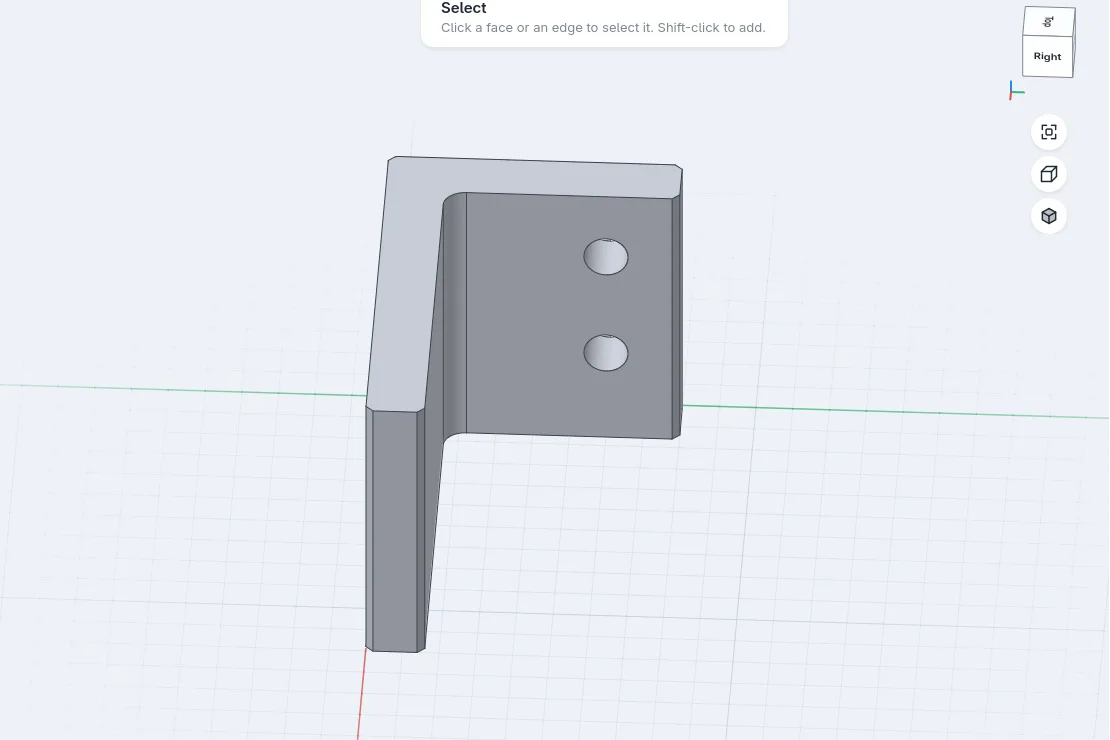
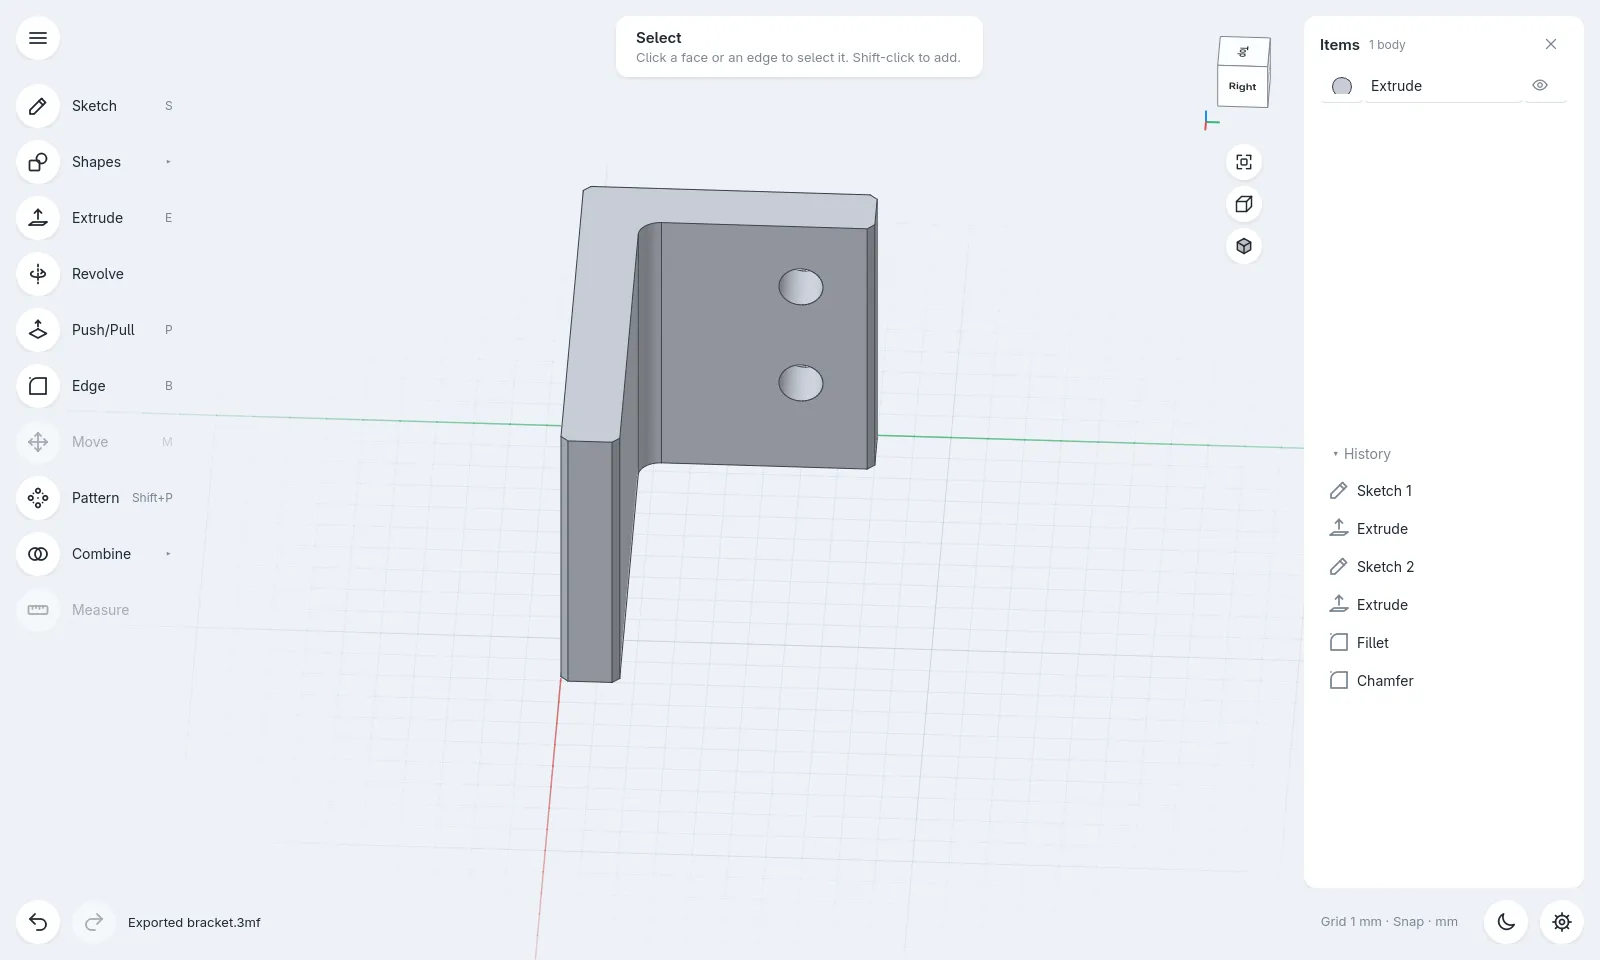
The Items card on the right lists your bodies, with History underneath. Each row is a step.
- 2
Double-click to edit
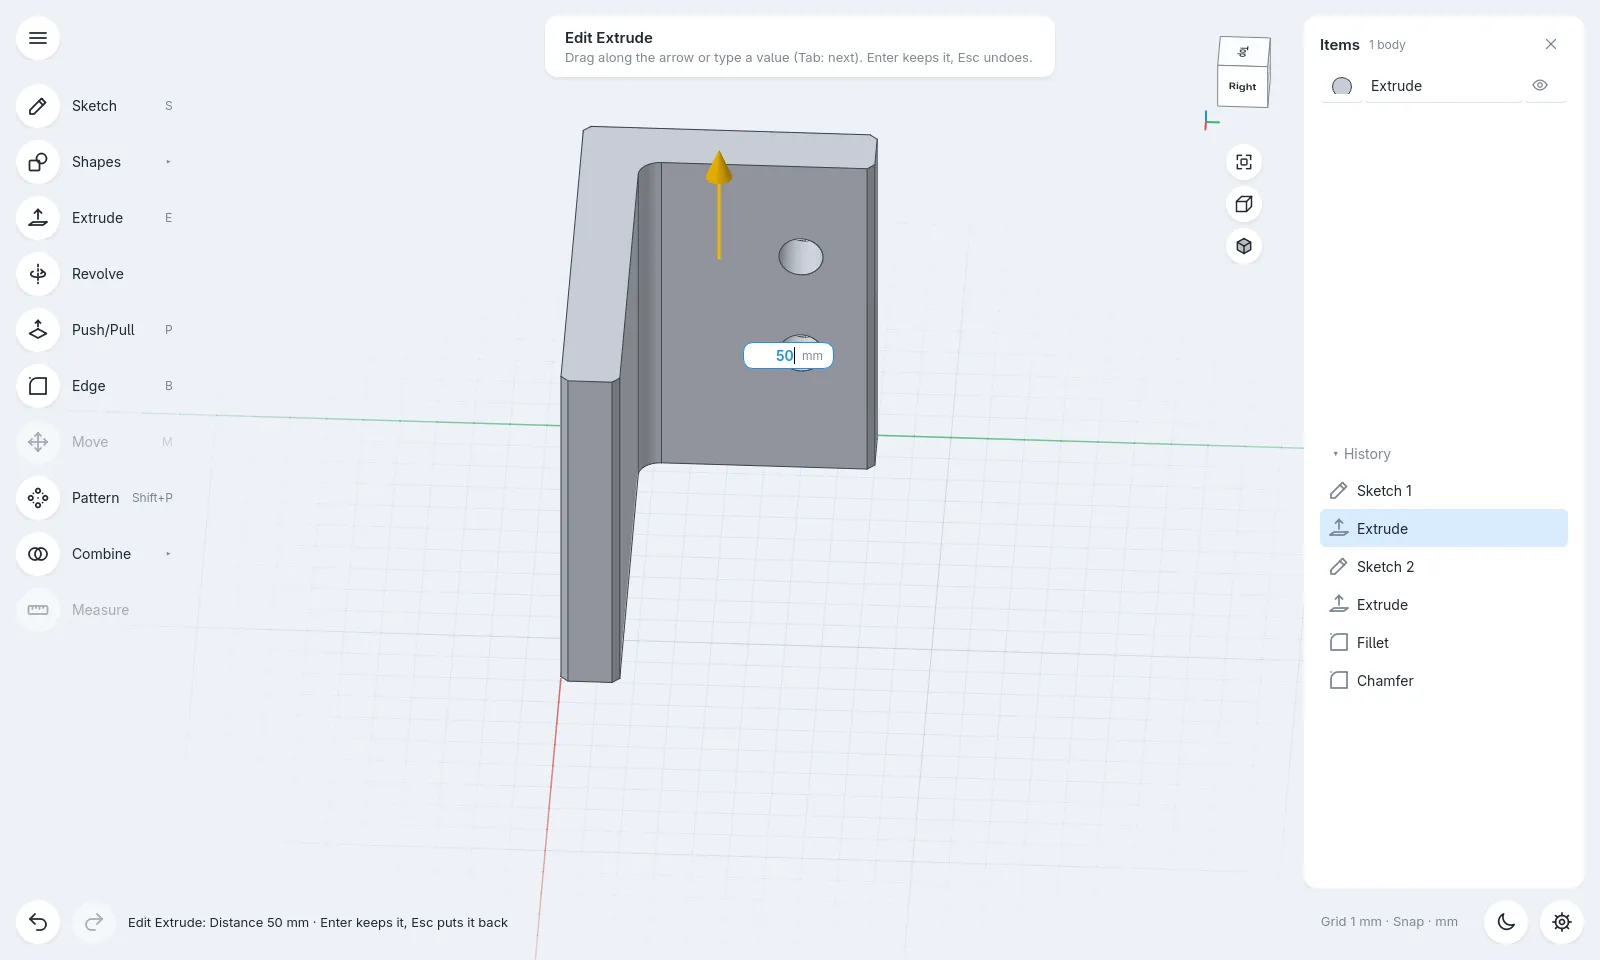
Double-click Extrude and type 50. The holes, fillet and chamfer all follow. Enter keeps it, Esc puts it back.
EnterEsc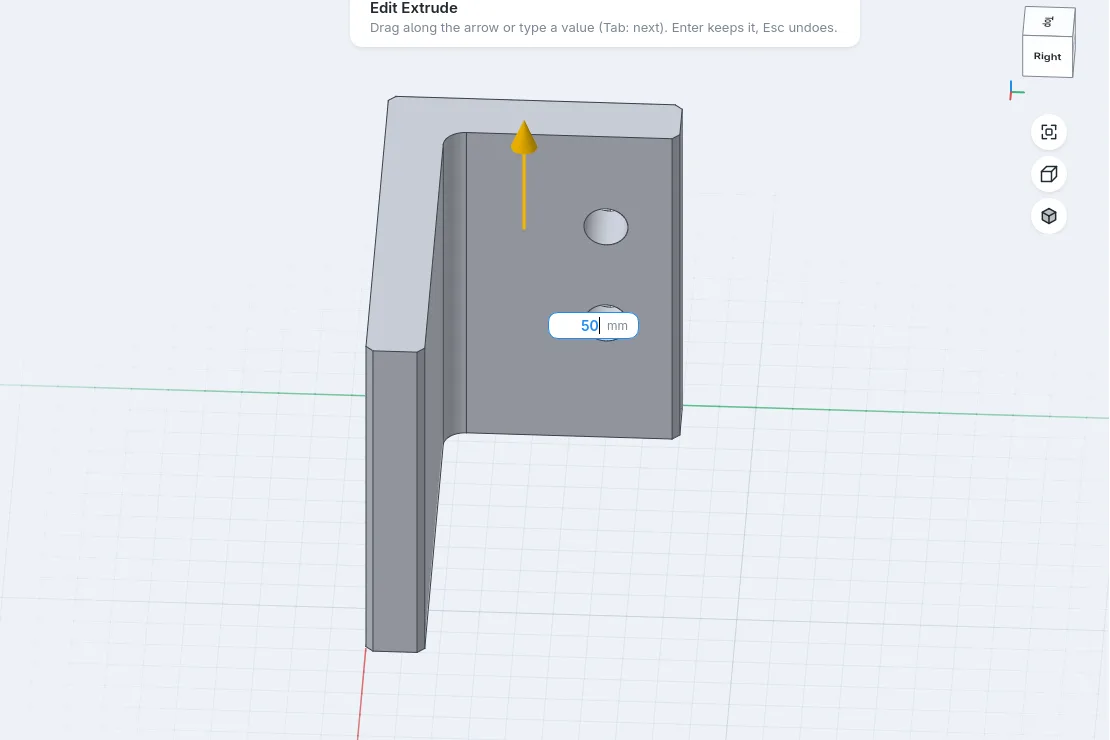
- 3
Safe when it can't work
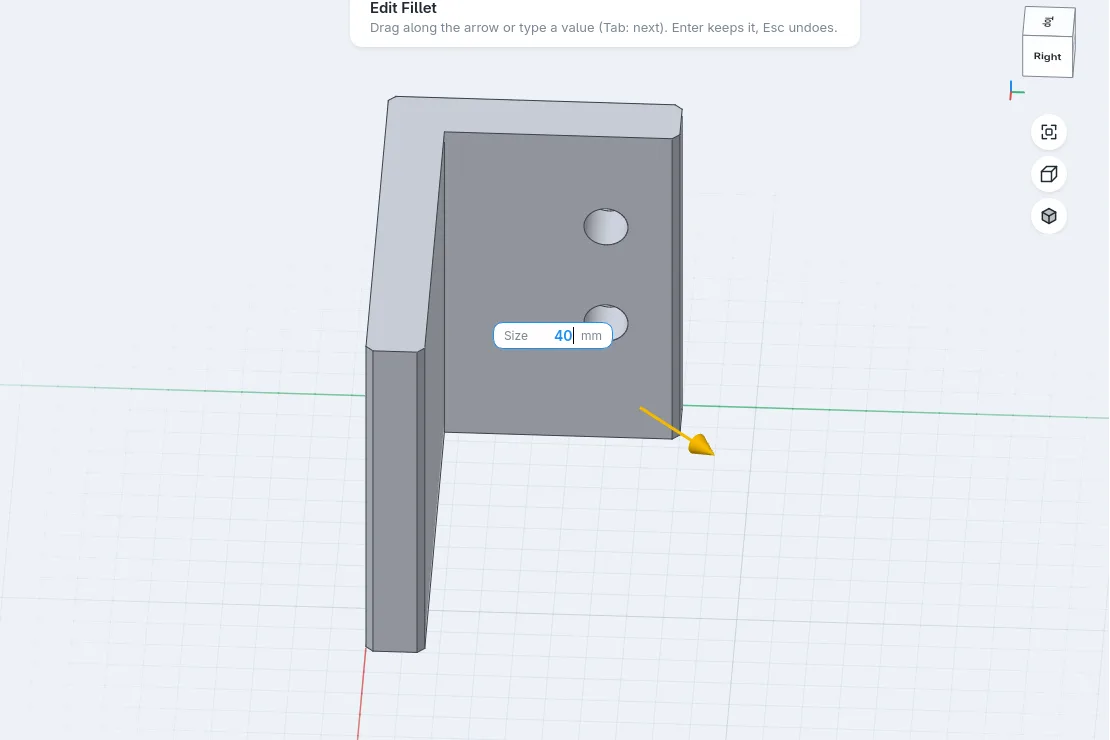
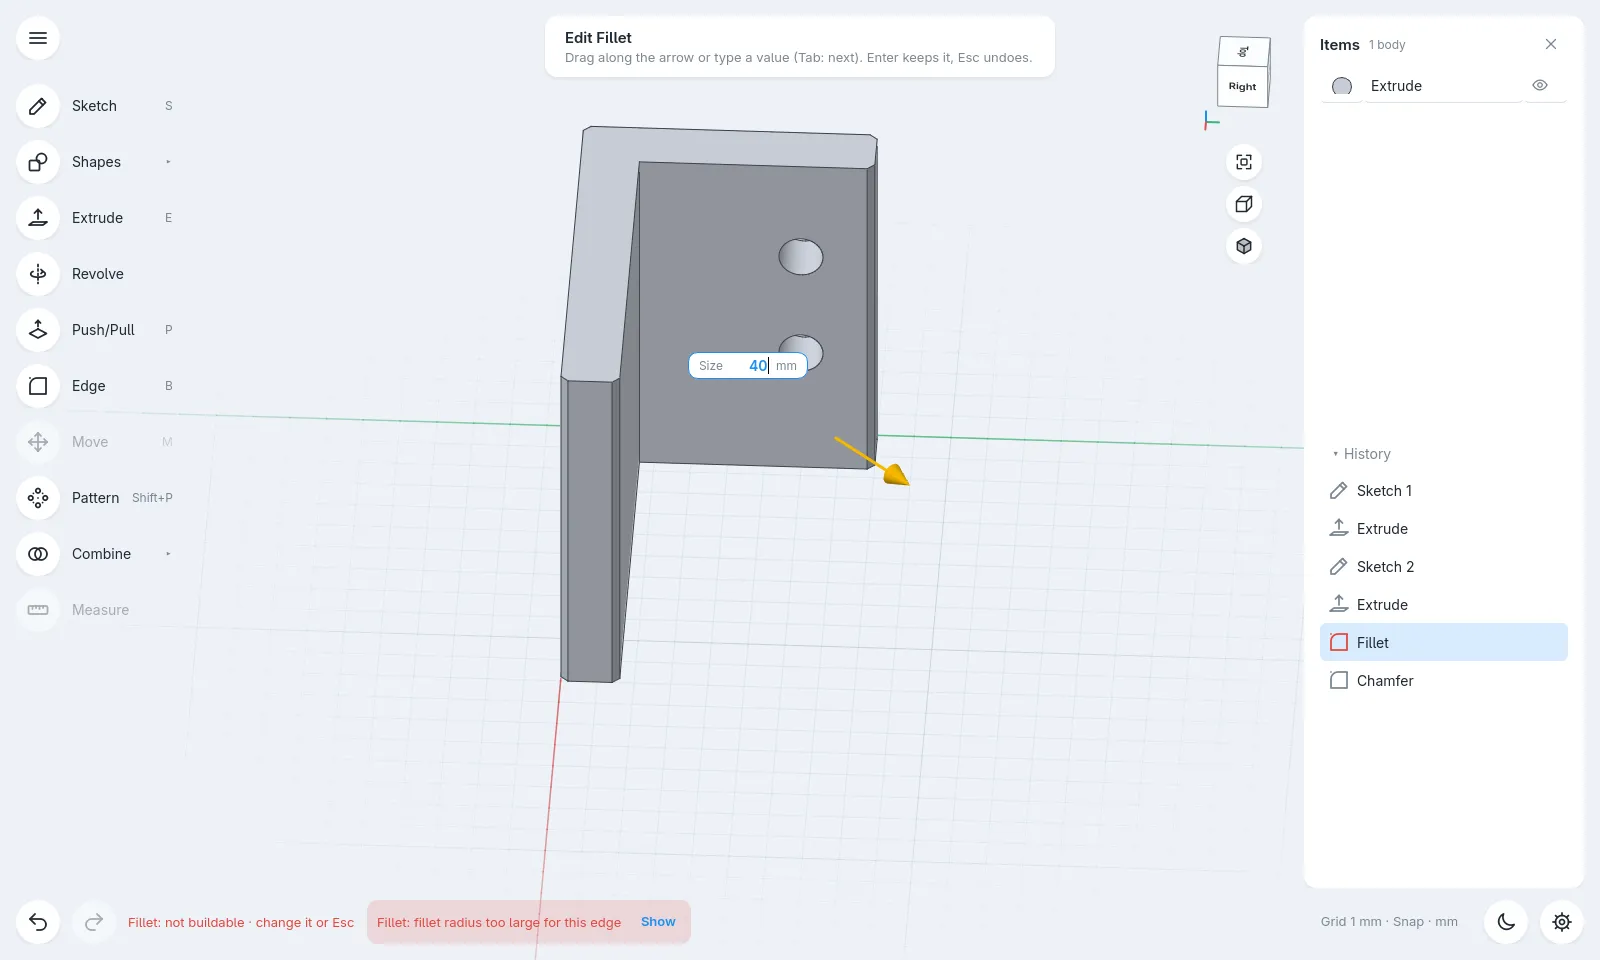
Ask for something impossible, like a 40 mm fillet, and the step turns red with the reason. The last good part stays.
- 4
Name your numbers
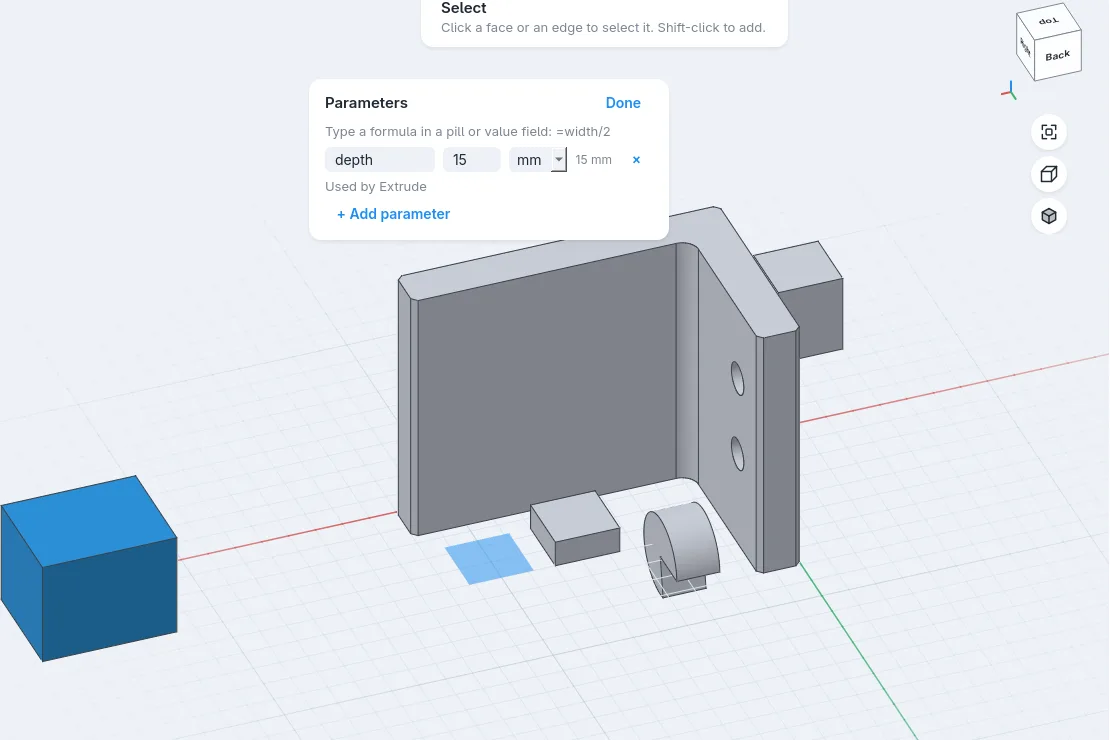
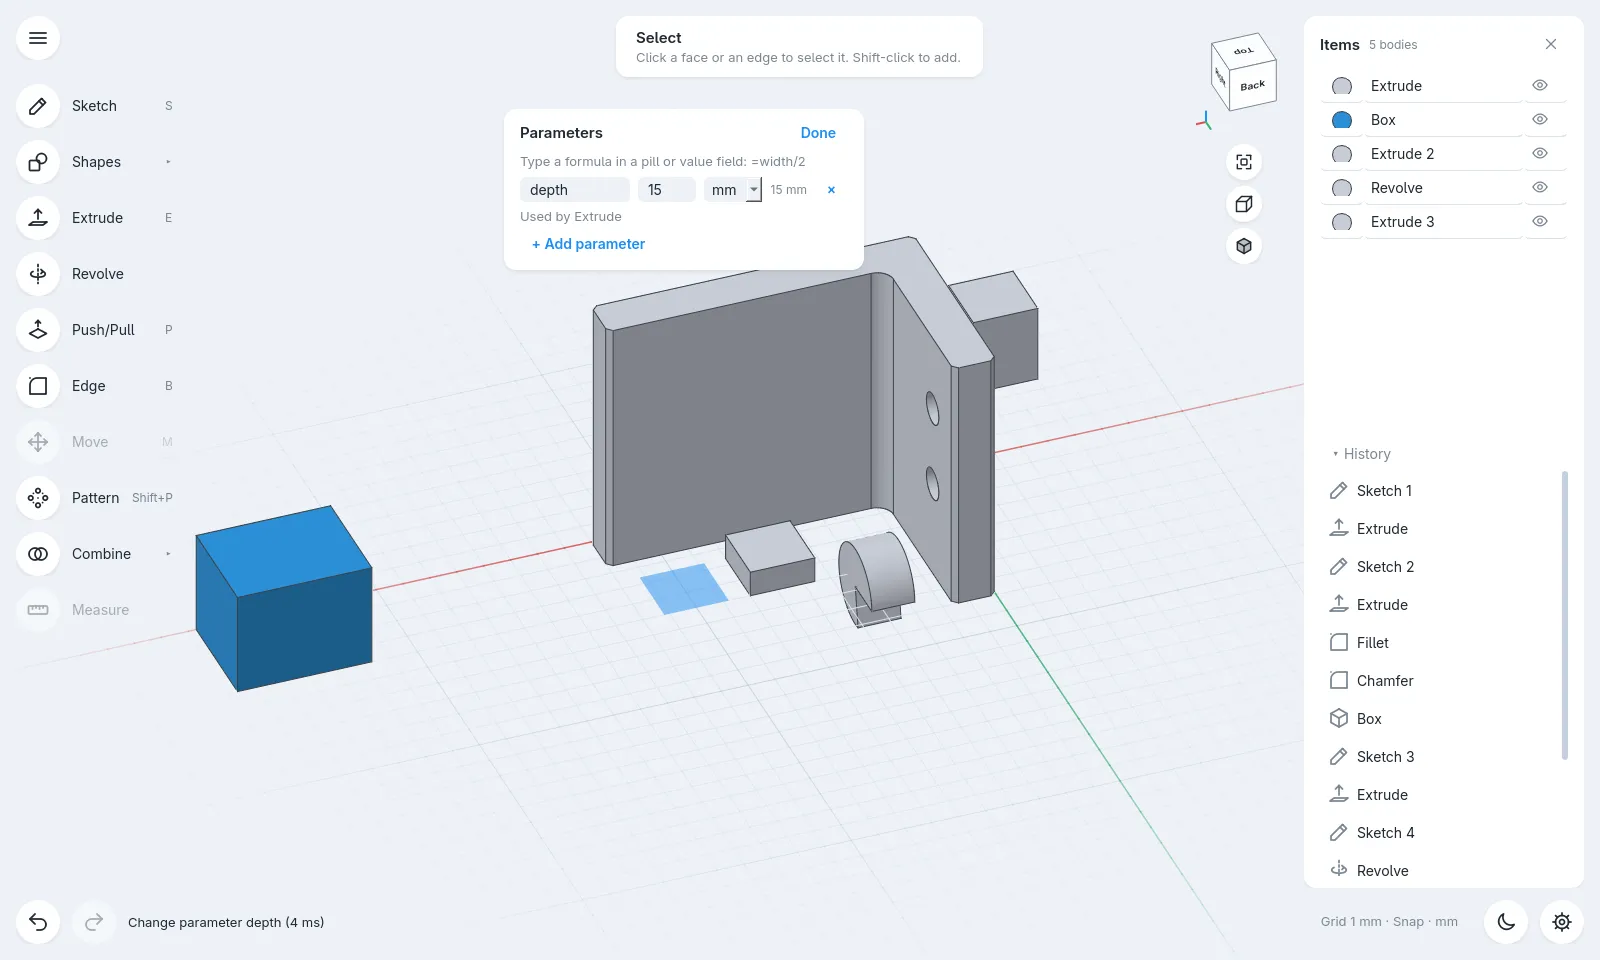
Add a parameter like depth = 6 and type =depth into any value. Change it in one place, the part updates everywhere.
=
Let an AI agent do the boring bit
formbar includes an MCP server. Any AI agent that speaks MCP can build real formbar parts: sketches with constraints, extrudes, fillets, patterns and parameters. You get an editable file back, not a mesh.
- 1
Add formbar to your agent
formbar's MCP server starts with the
formbar-mcpcommand. Add it as an MCP server in your agent's settings. It talks over stdio and runs headless, so nothing pops up on screen.{ "mcpServers": { "formbar": { "command": "formbar-mcp" } } } - 2
Ask for the tedious part
Be specific about sizes and what it is for. Ask for named parameters so you can tweak them later, and ask it to check the part is printable.
Use formbar to model a spur gear: module 2, 24 teeth, 15 mm thick, 8 mm bore with a 2 mm keyway. Make "teeth" a parameter. Check it is printable, export an STL and save the .formbar file. - 3
Open it and make it yours
Open the .formbar file. Every step is in the history, every number is editable. Change
teethfrom 24 to 30 and the gear rebuilds. Now do the fun part: the hub, the spokes, the feel.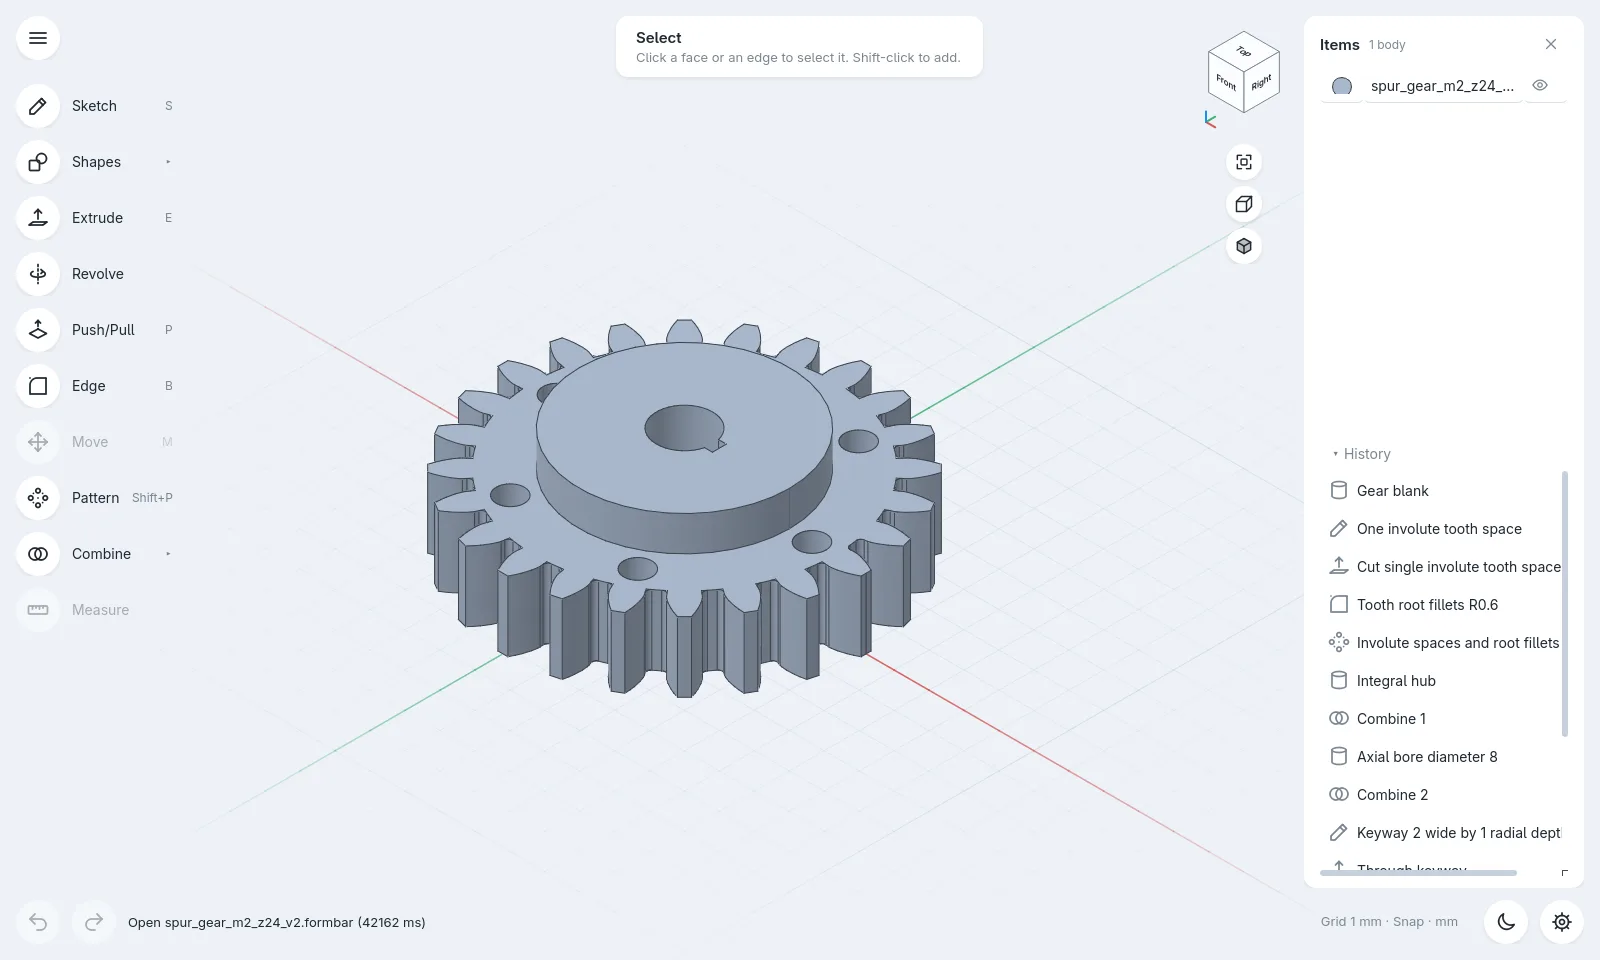
Keyboard shortcuts
Single letters never fire while you are typing in a field. In sketch mode some letters change meaning: F is Fillet, P is Project, S is Spline.
Everywhere
- S
- Sketch (on the selected face)
- E
- Extrude
- LRCA
- Line, rectangle, circle, arc
- D
- Dimension
- M
- Move body
- F
- Fit view
- Space
- Command palette
- Esc
- Cancel / clear selection
- Ctrl+Z
- Undo
Body mode
- P
- Push/pull a face
- B
- Fillet / chamfer an edge
- ⇧B⇧C⇧S
- Box, cylinder, sphere
- ⇧O⇧T
- Cone, torus
- ⇧P
- Pattern
Sketch mode
- SN
- Spline, polygon
- OI
- Offset, mirror
- FH
- Fillet, chamfer
- TK
- Trim, split
- P
- Project body edges
- X
- Toggle construction
- G
- Snap to grid
While a tool runs
- 0–9
- Type a value
- Tab
- Next value
- 10,5@10,025<30
- Type a point (sketch)
- ACN
- Extrude: add, cut, new body
- c2
- Edge: chamfer 2 mm
- XYZ
- Move along an axis
- Enter
- Commit